Add your team and manage user groups on ZaveHub
In this article we will explain how you can manage user access, including how to invite users, assign users access levels and user groups.
We’re excited that your family’s growing!
This guide covers how you can invite more users into ZaveHub and set up user groups for your team.
Notes: Only users with Admin rights will be able to add new members and amend user access rights.
You can create ‘User Groups’ and then invite users or you can first invite users and then assign users to groups at a later date.
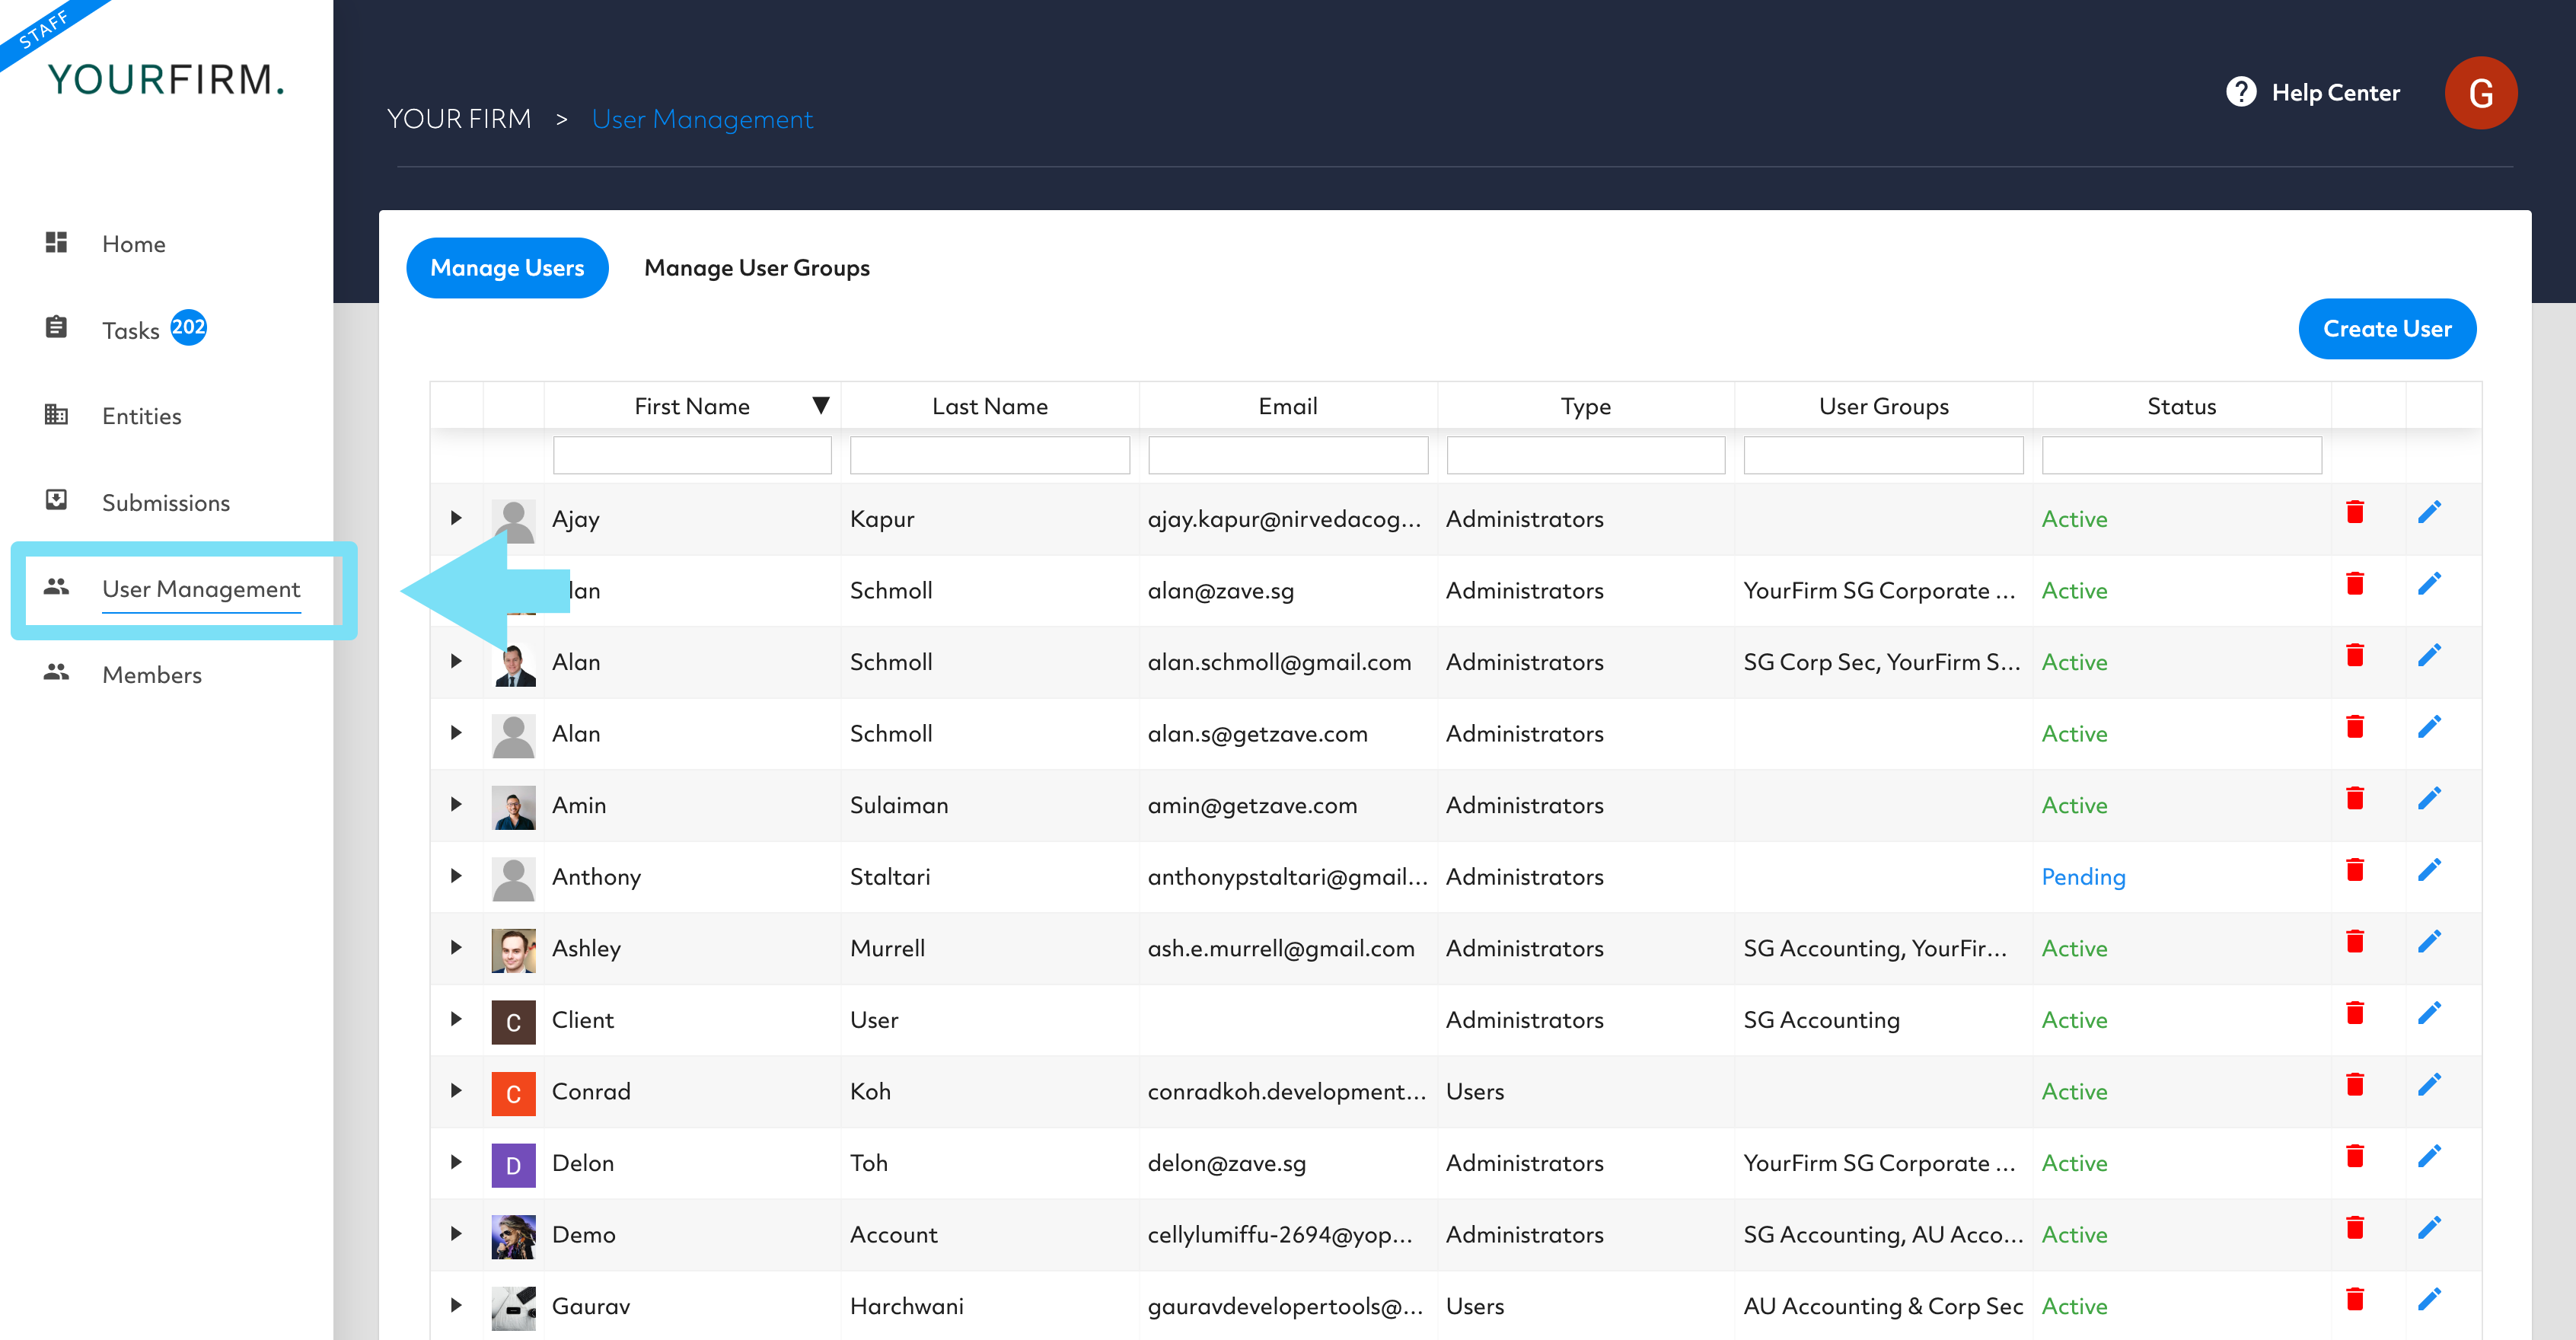
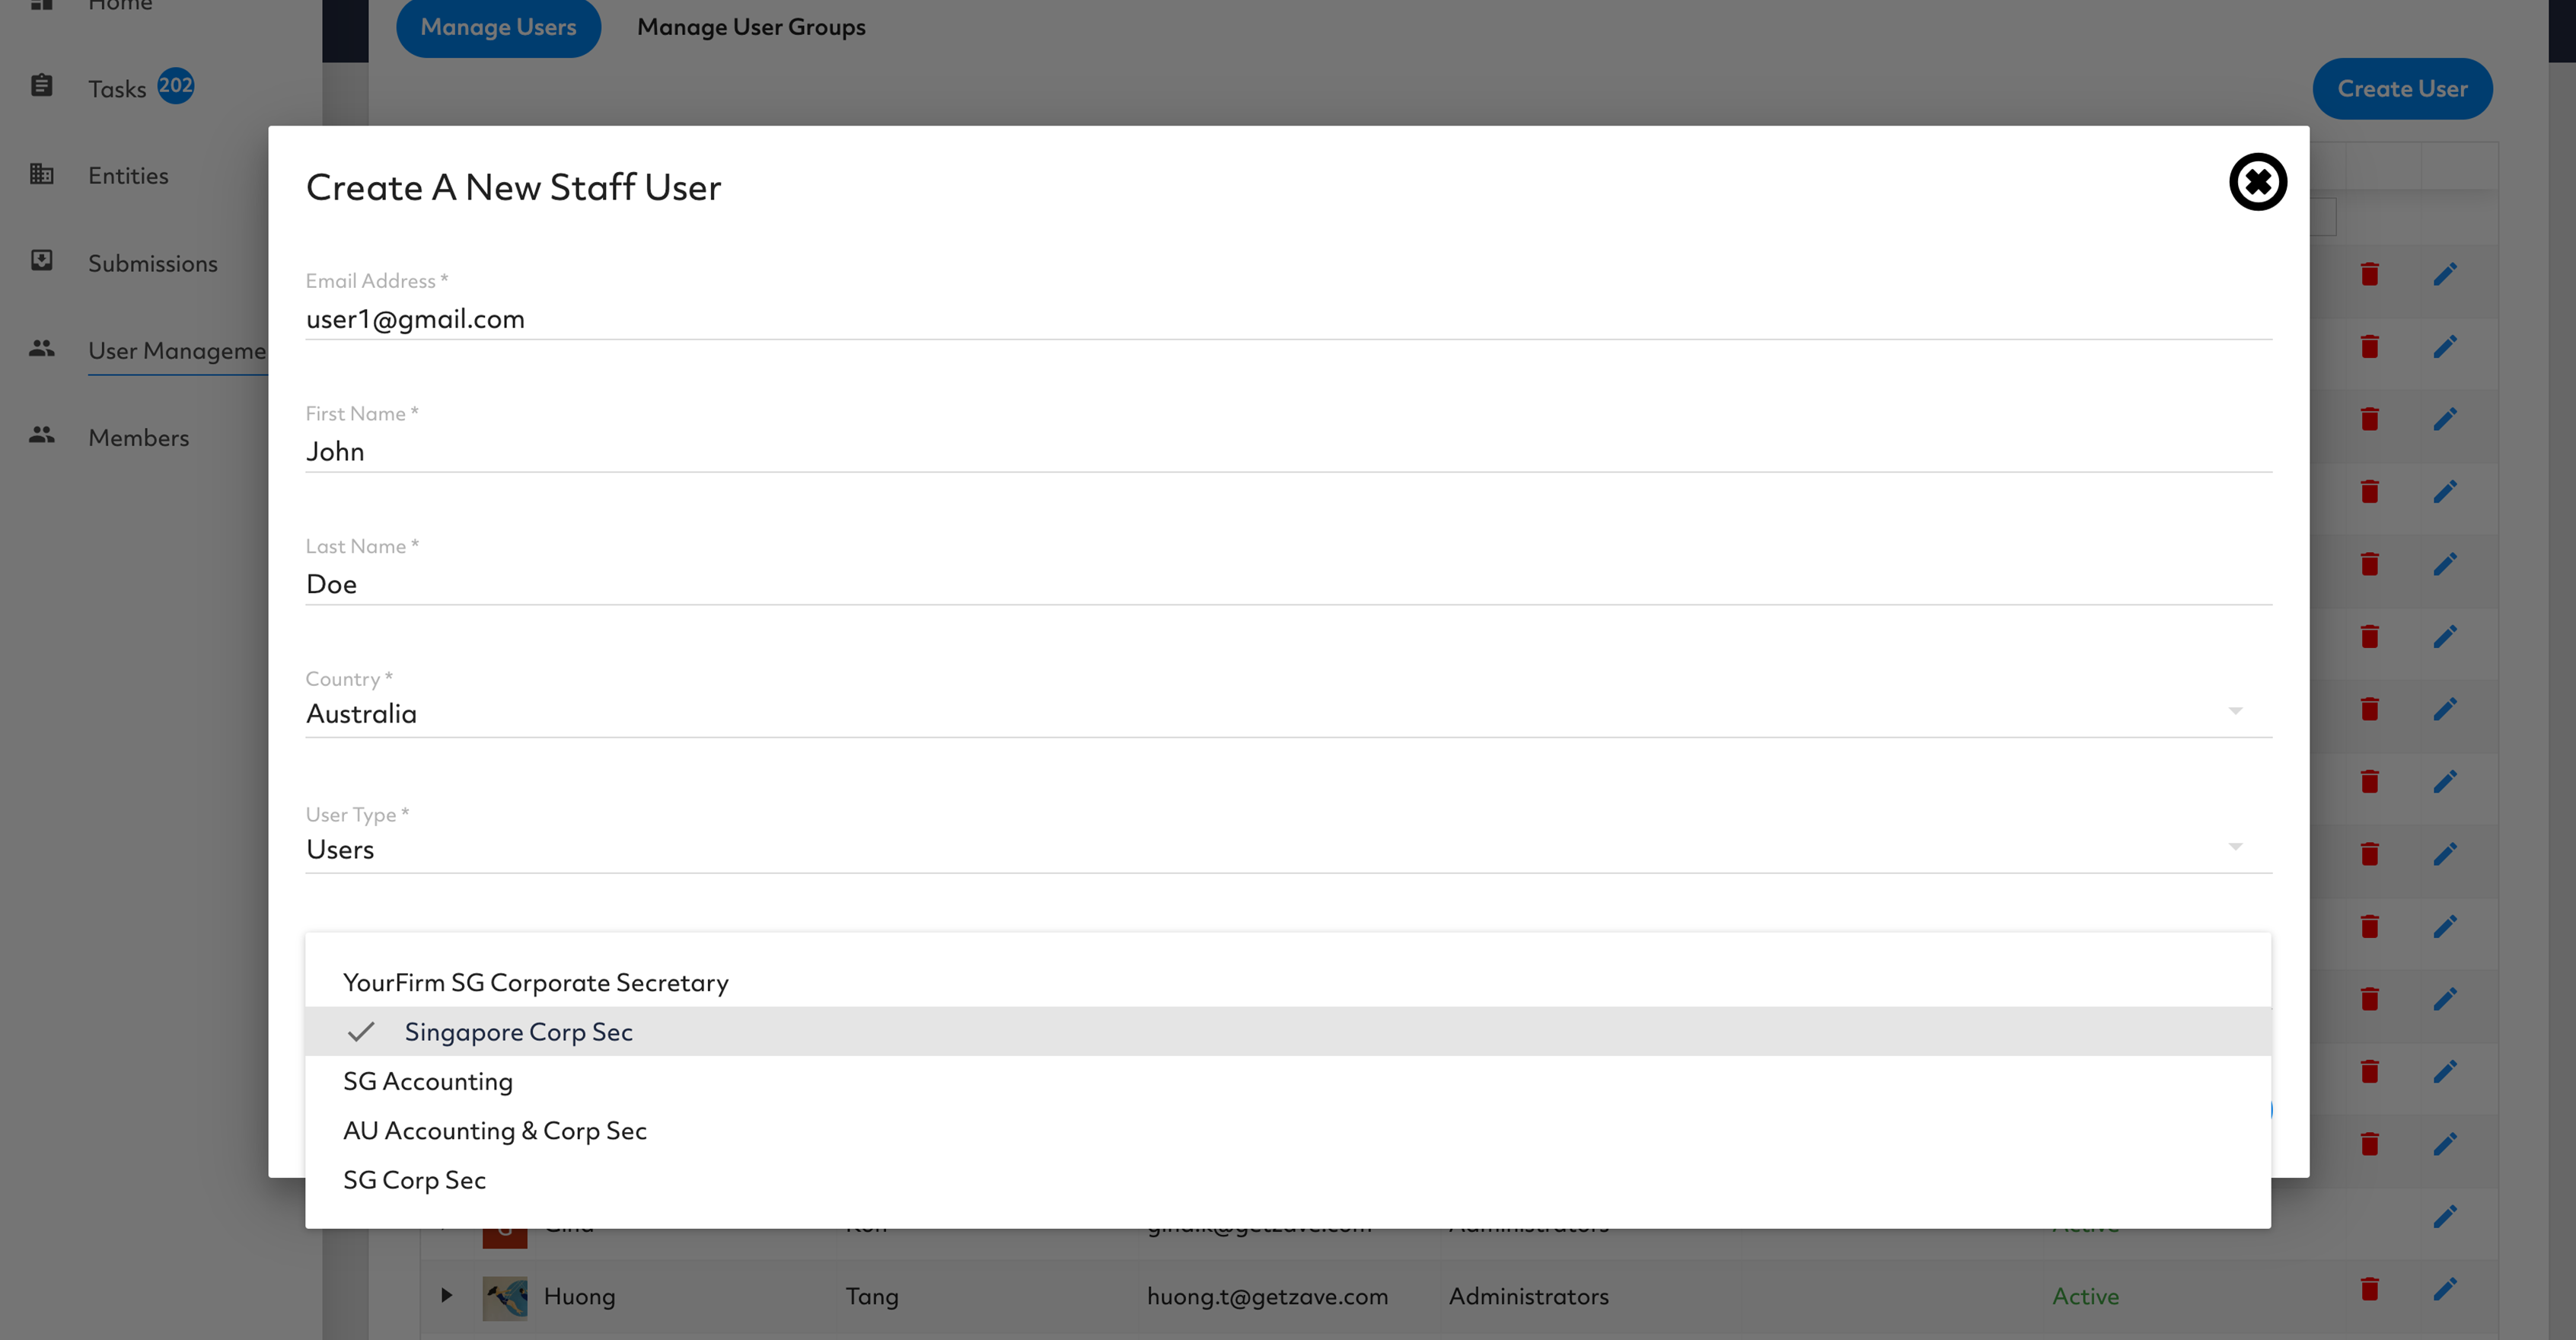
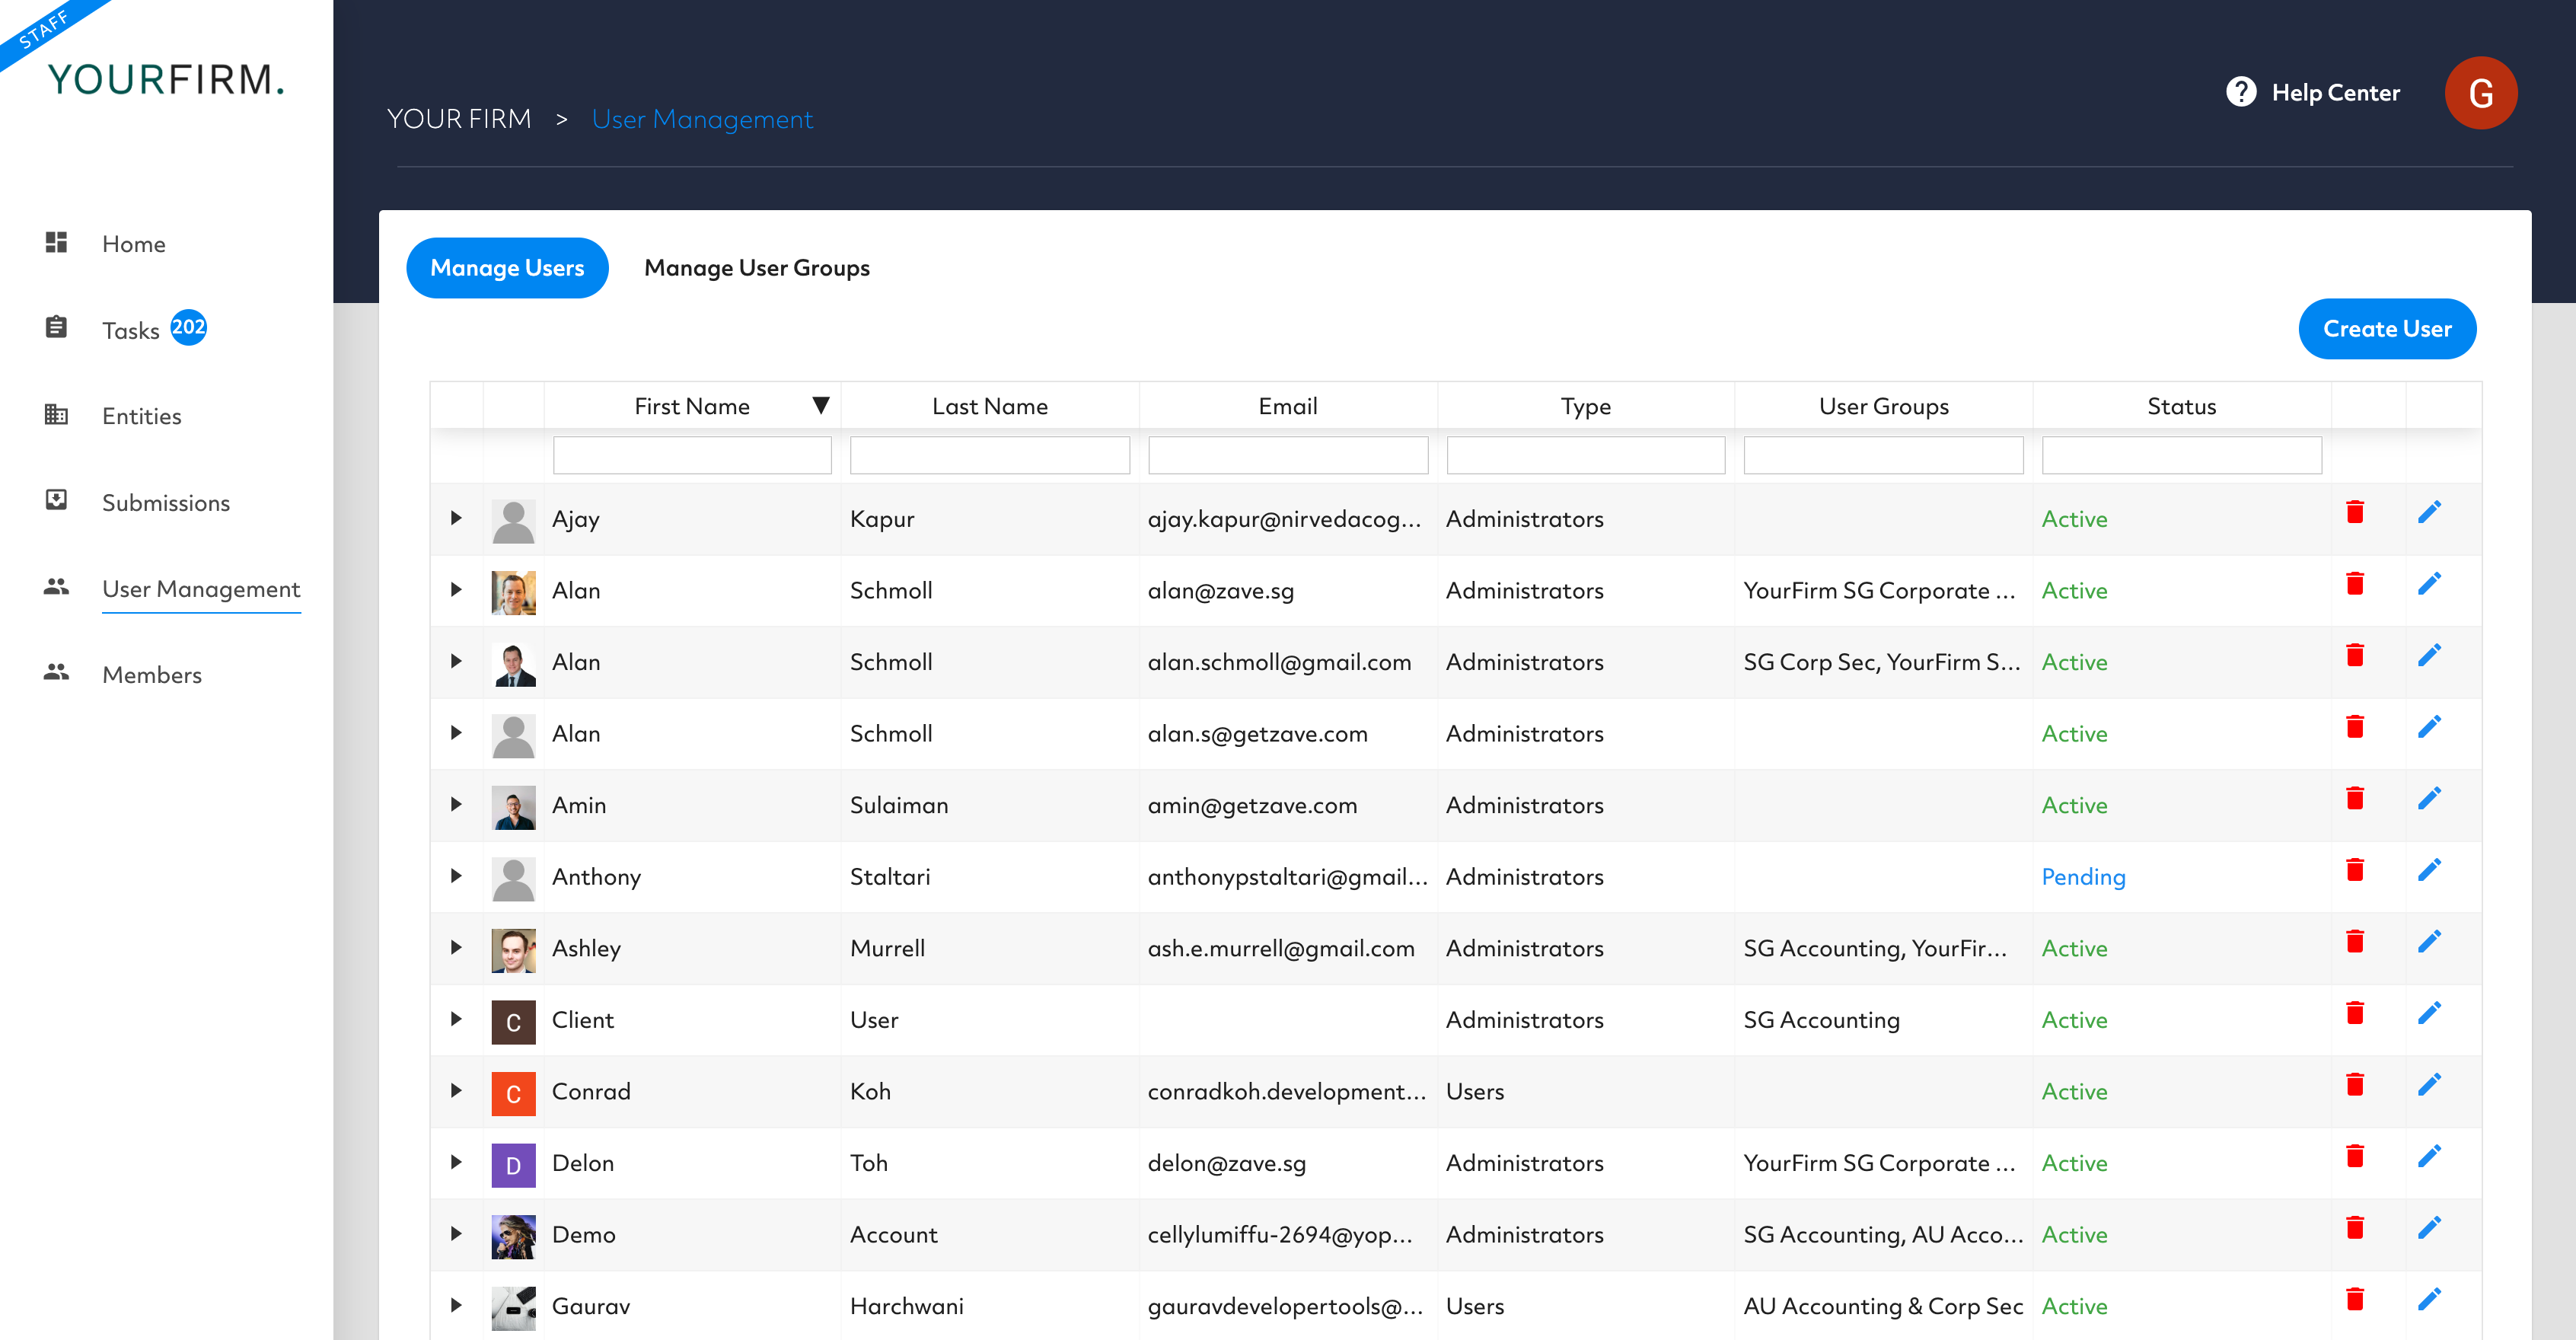
1. Access ‘User Management’ from the left-hand side of the features
In this section, you will be able to ‘Create Users” and see all existing users previously created.
In creating the user, there are two choices depending on the level of access required:
- ‘Admin’ – Key client users, with additional privileges, can see all entities and add additional users.
- ‘User’ – Standard users who can view and access only the entities that have been assigned to them.
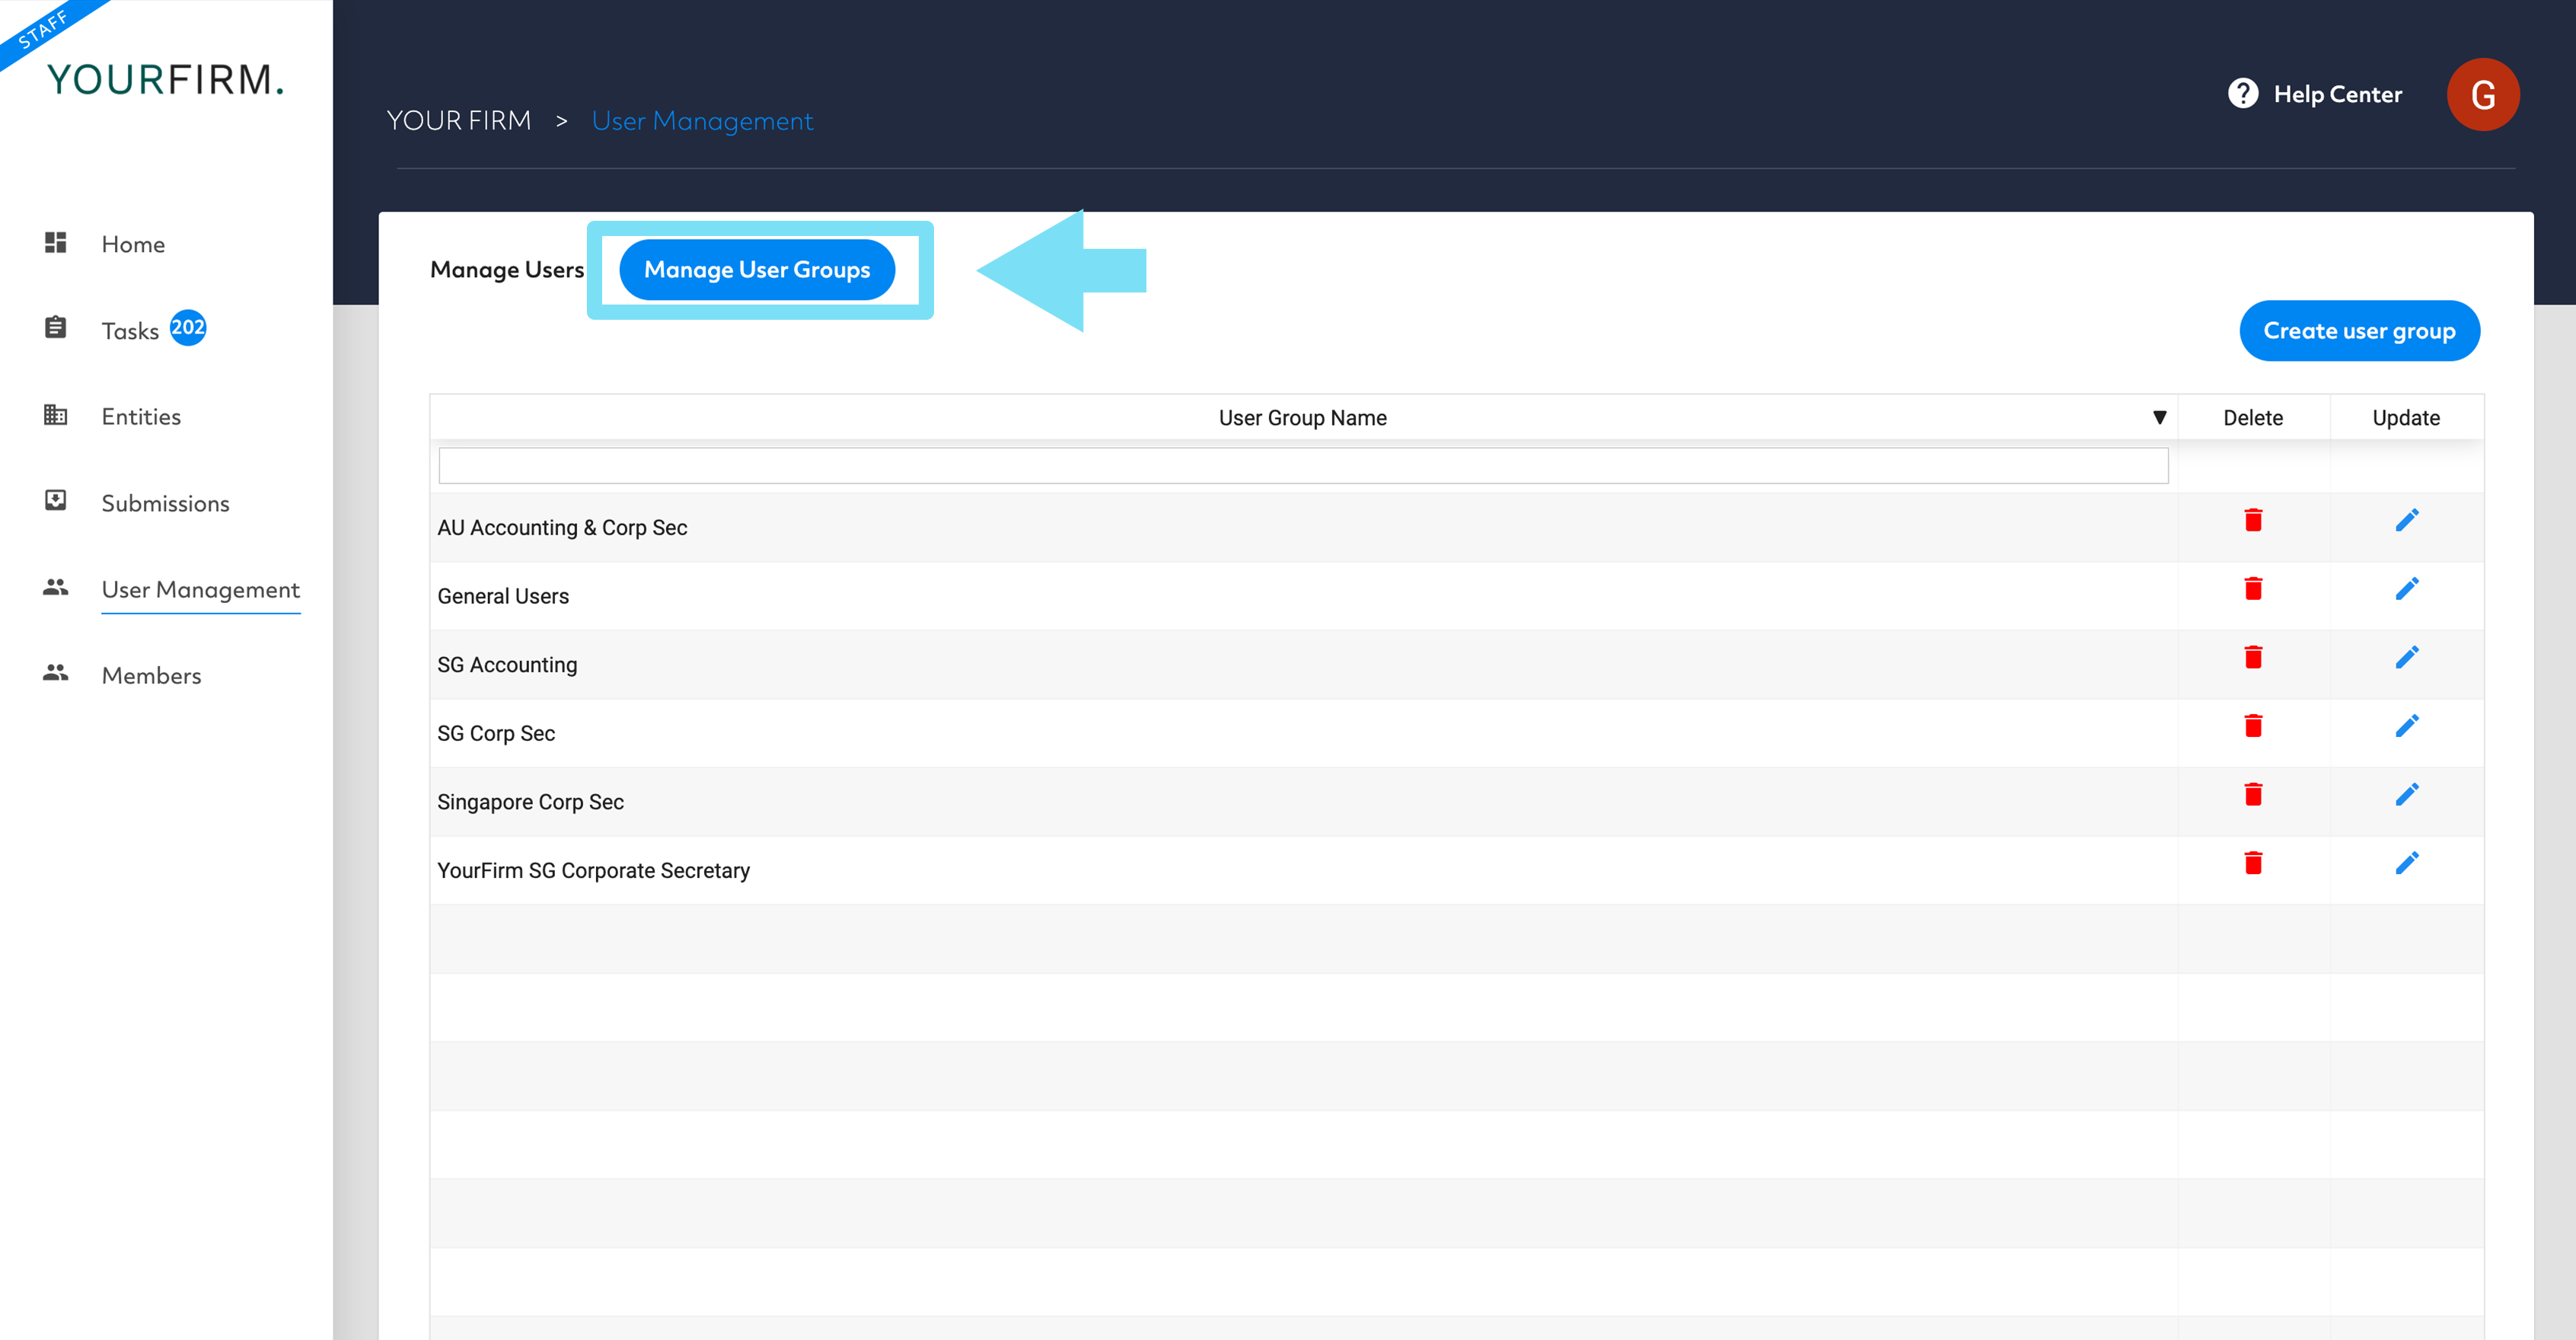
2. Click on ‘Manage User Groups’
Here you can create groups to suit your specific team structure or service offering.
- You may choose to structure ‘User Group’ access according to the service lines within your Practice (e.g. Company Secretarial, Accounting, Tax, Legal)
- You may create ‘User Groups’ by location or jurisdiction
- You may create ‘User Groups’ according to specific Entities or Clients.
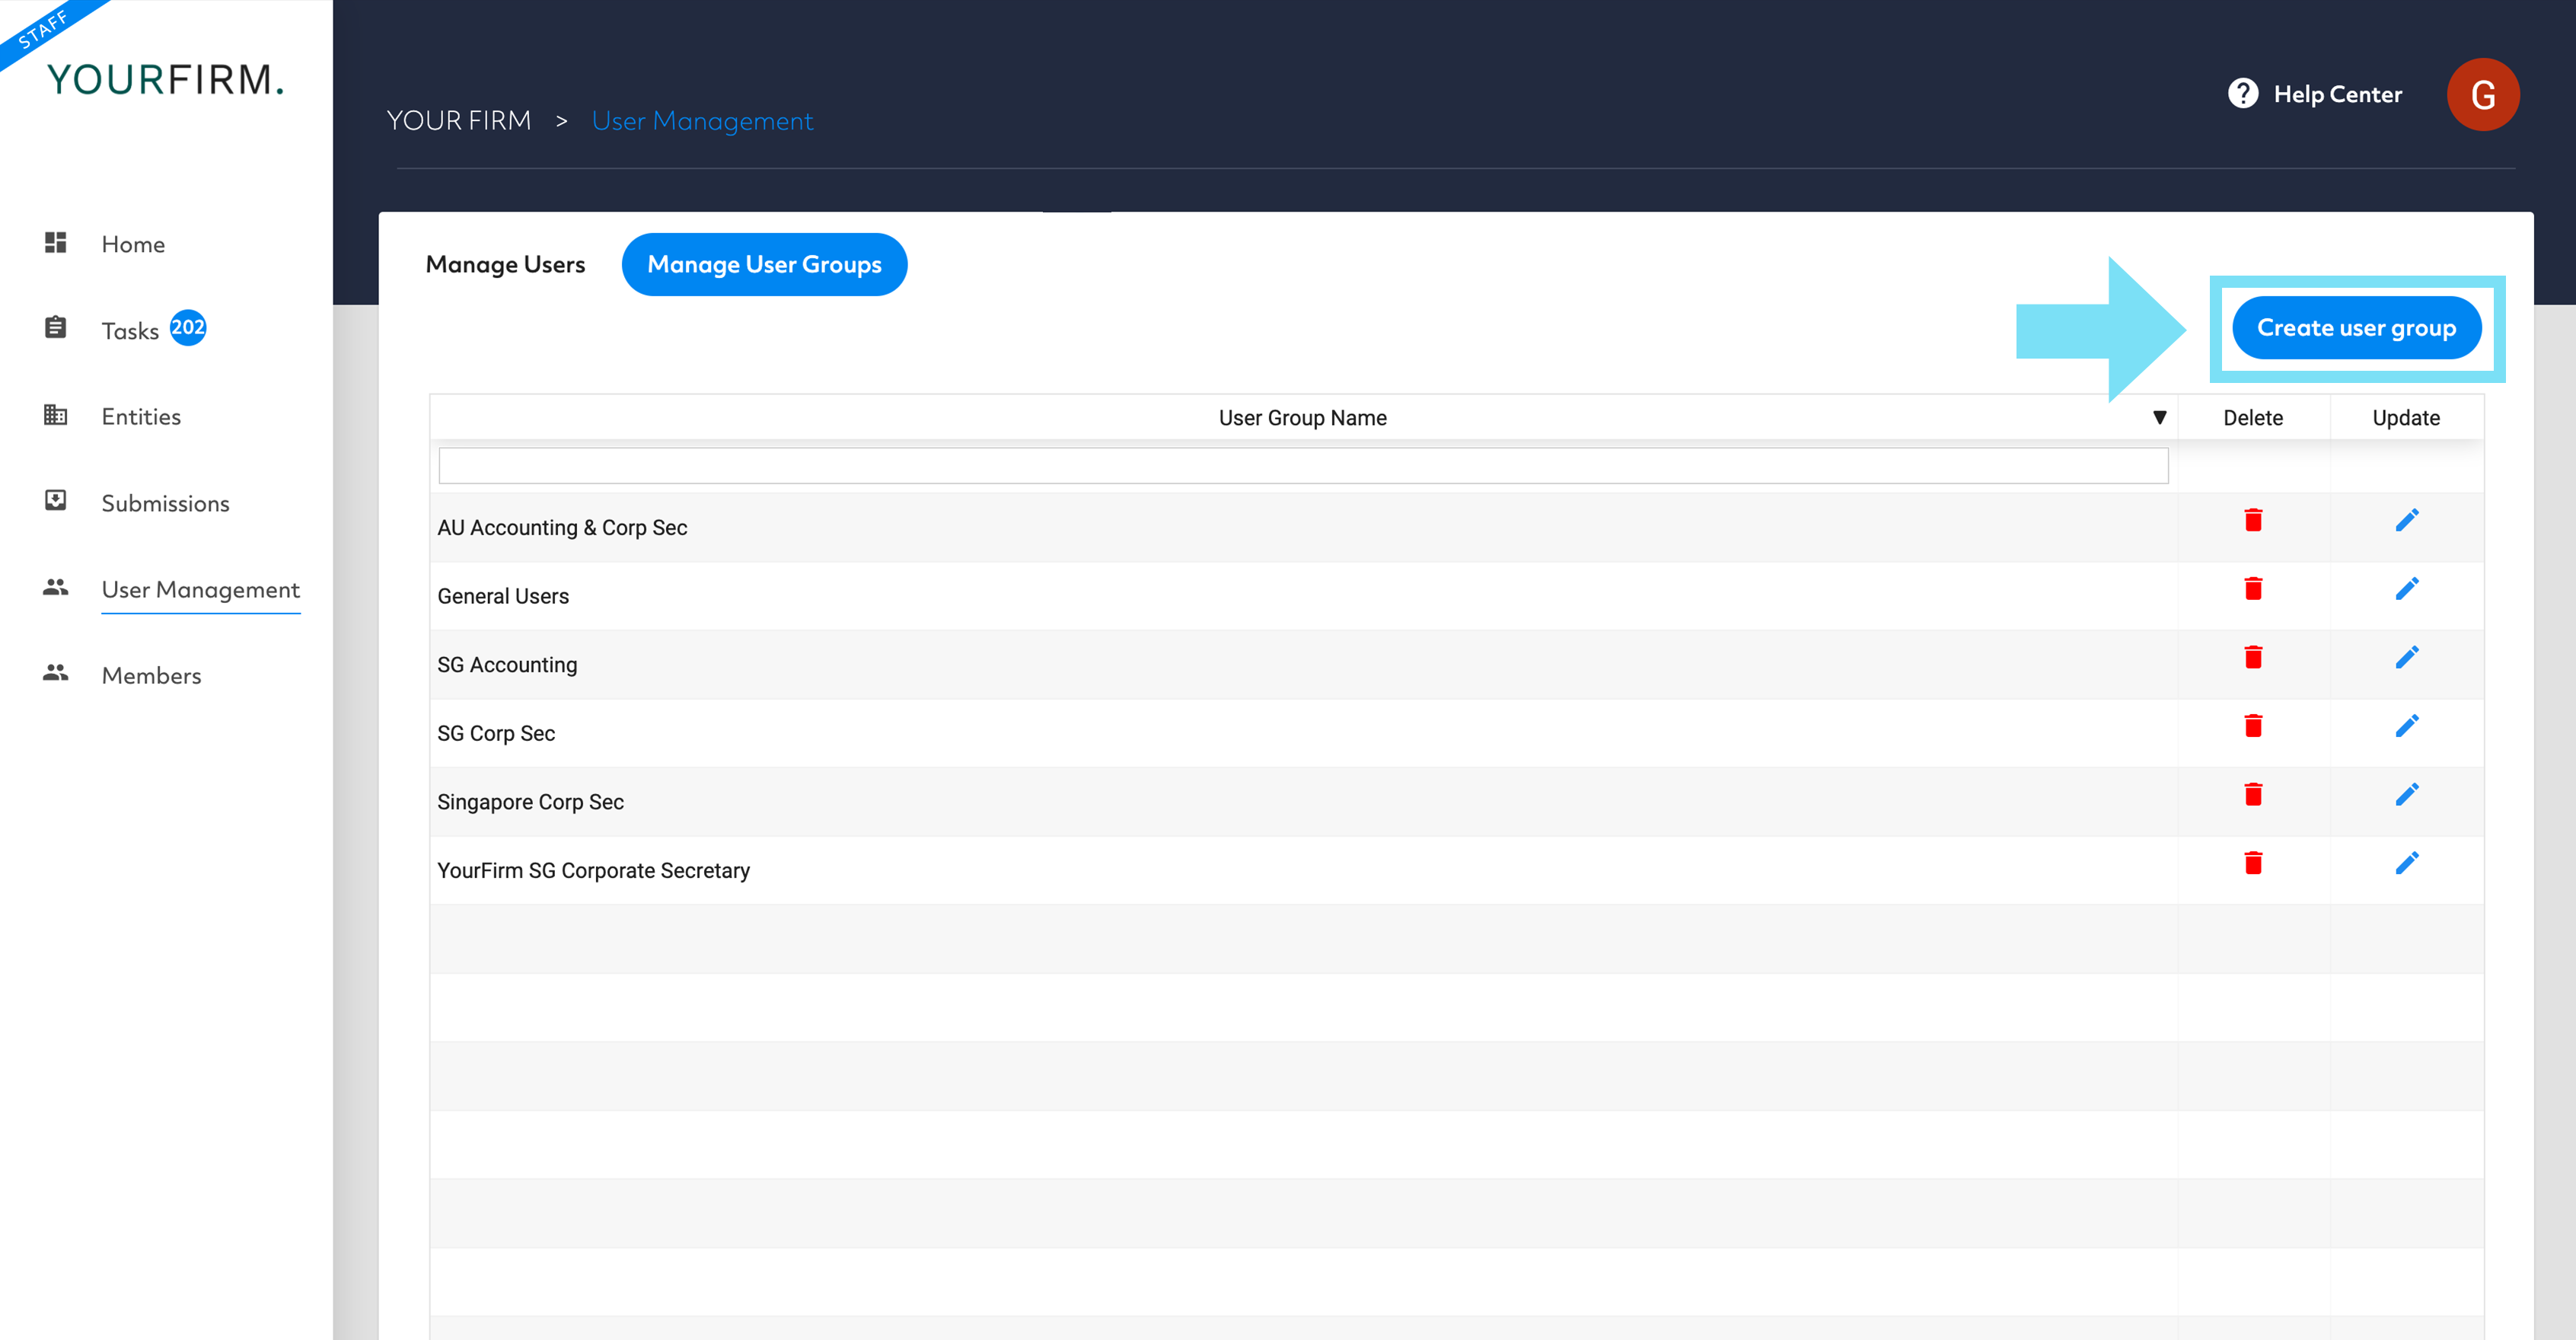
3. Click on “Create User Group”.
4. Populate the relevant fields provided.
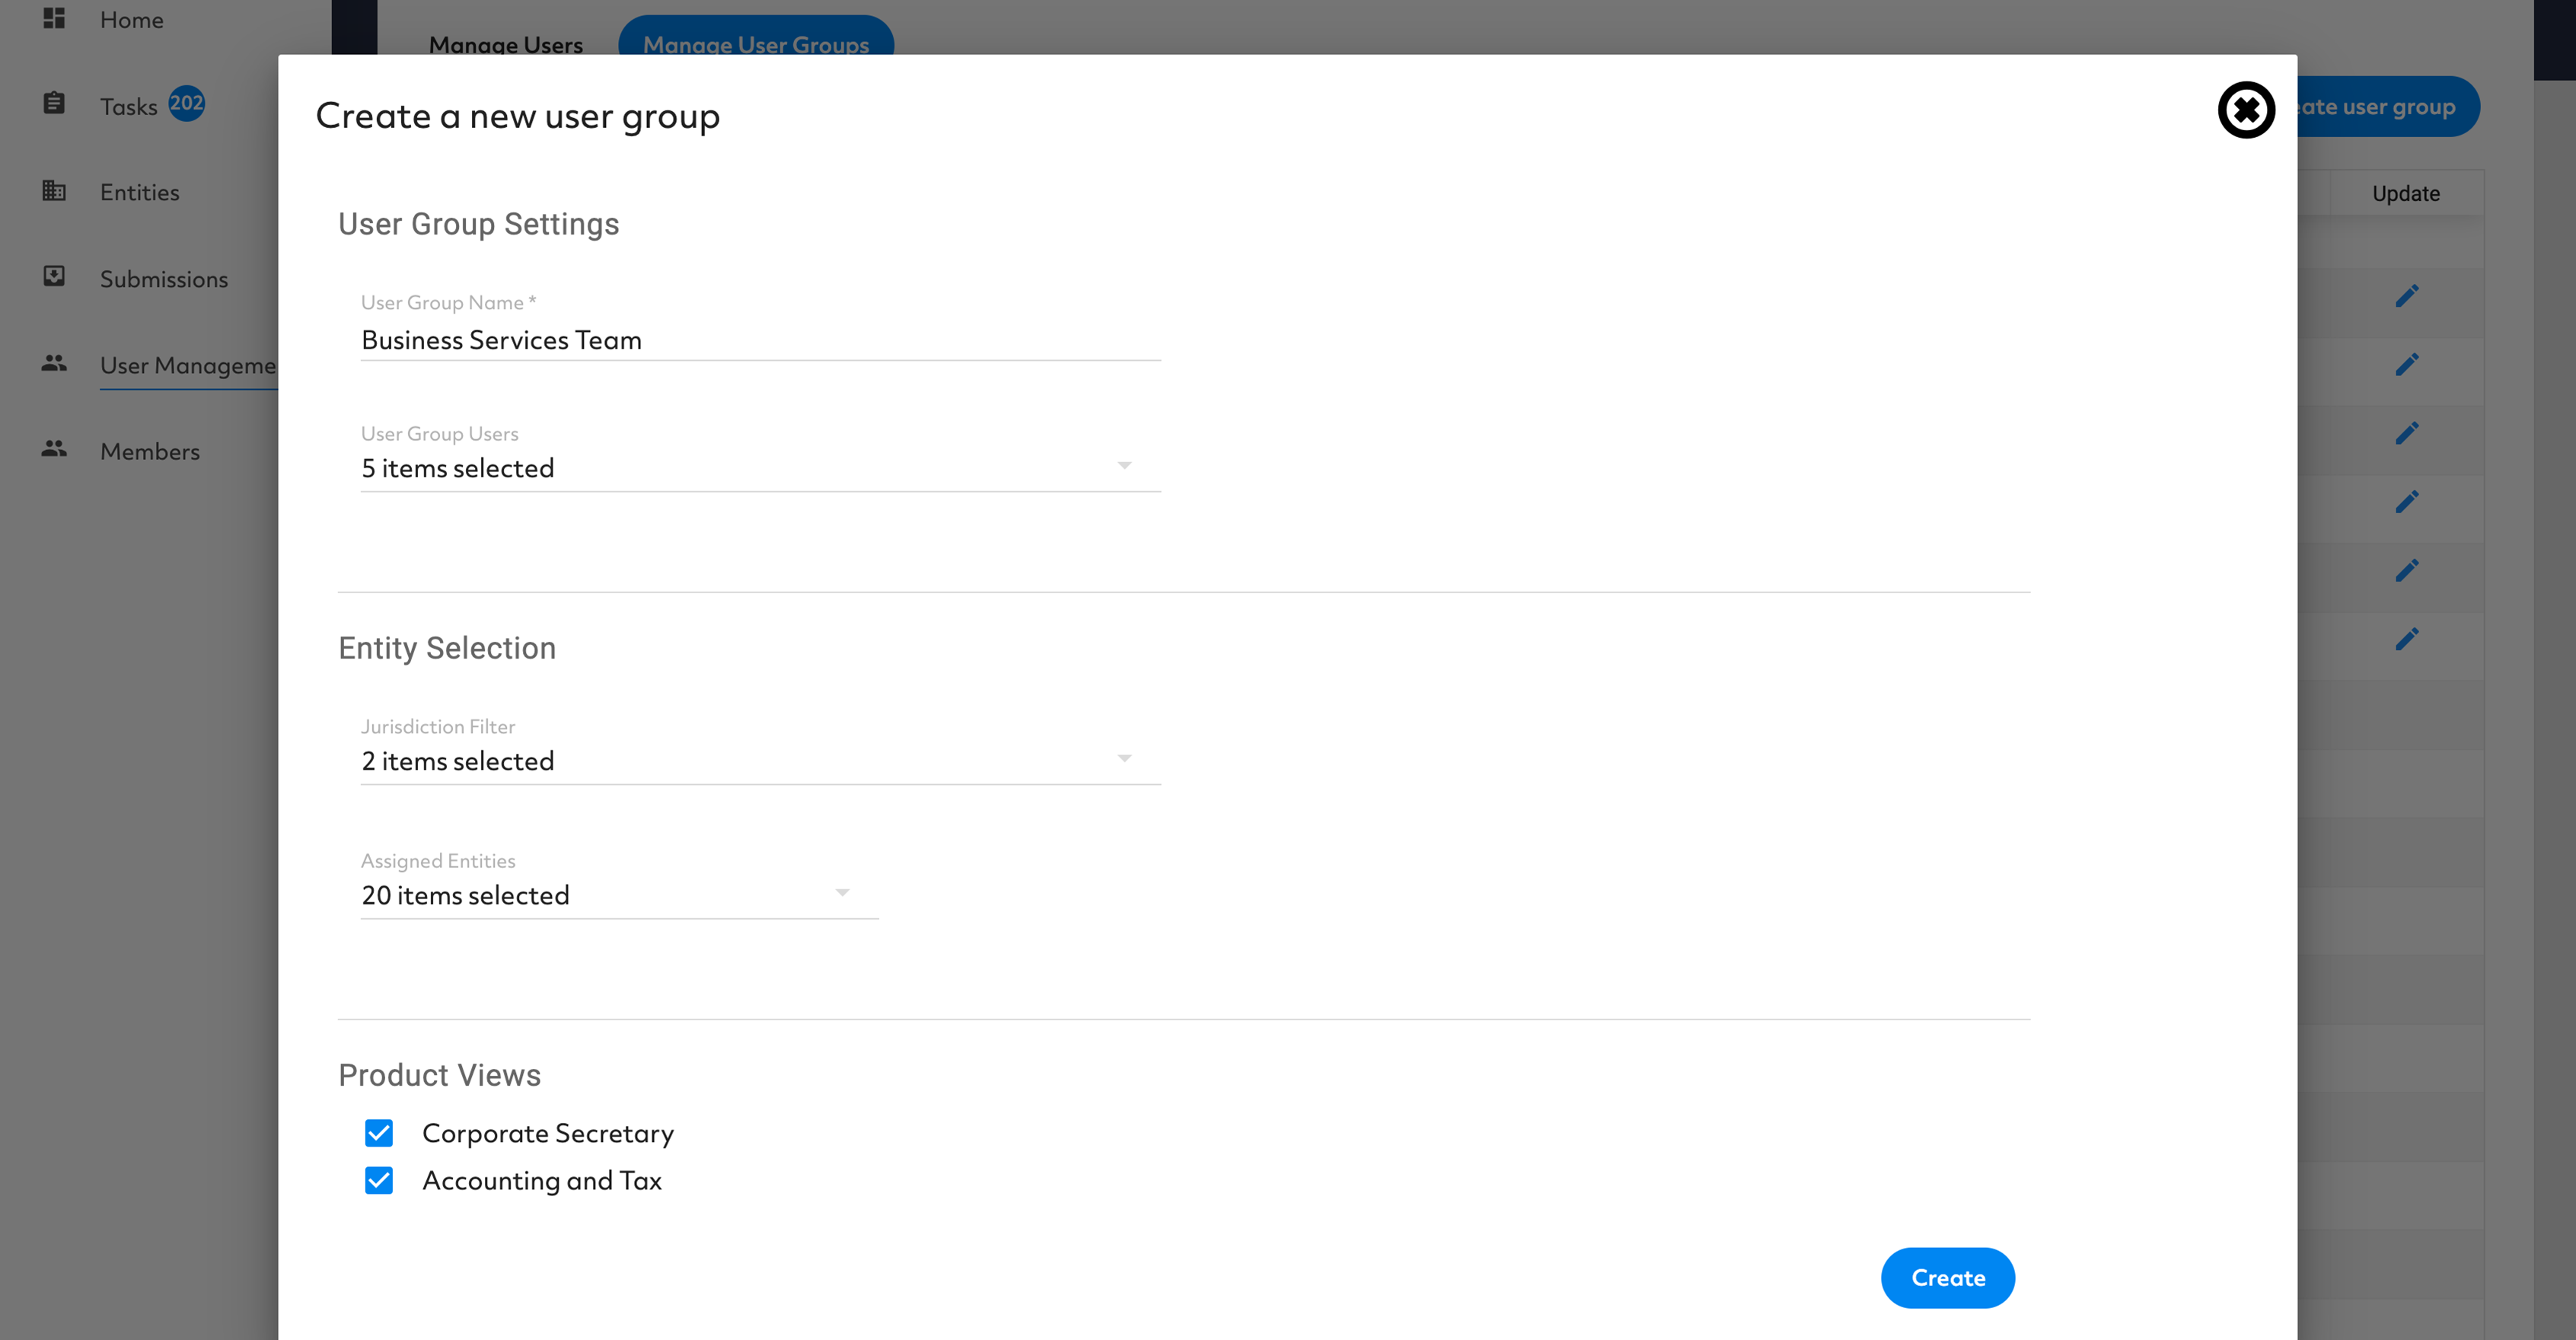
5. Once you have decided which User Groups you would like to set up, this will enable you to allocate individual users to these groups.
- Note: One user can be included across multiple ‘User Groups’.
6. You can now invite users to the ‘User Groups’ you have just created.
7. Once the invite is sent, you will be able to see the status of the user in the green text – either ‘Pending’ or ‘Active’. Once the user accepts the invite, the status will be changed from ‘Pending’, to ‘Active’.
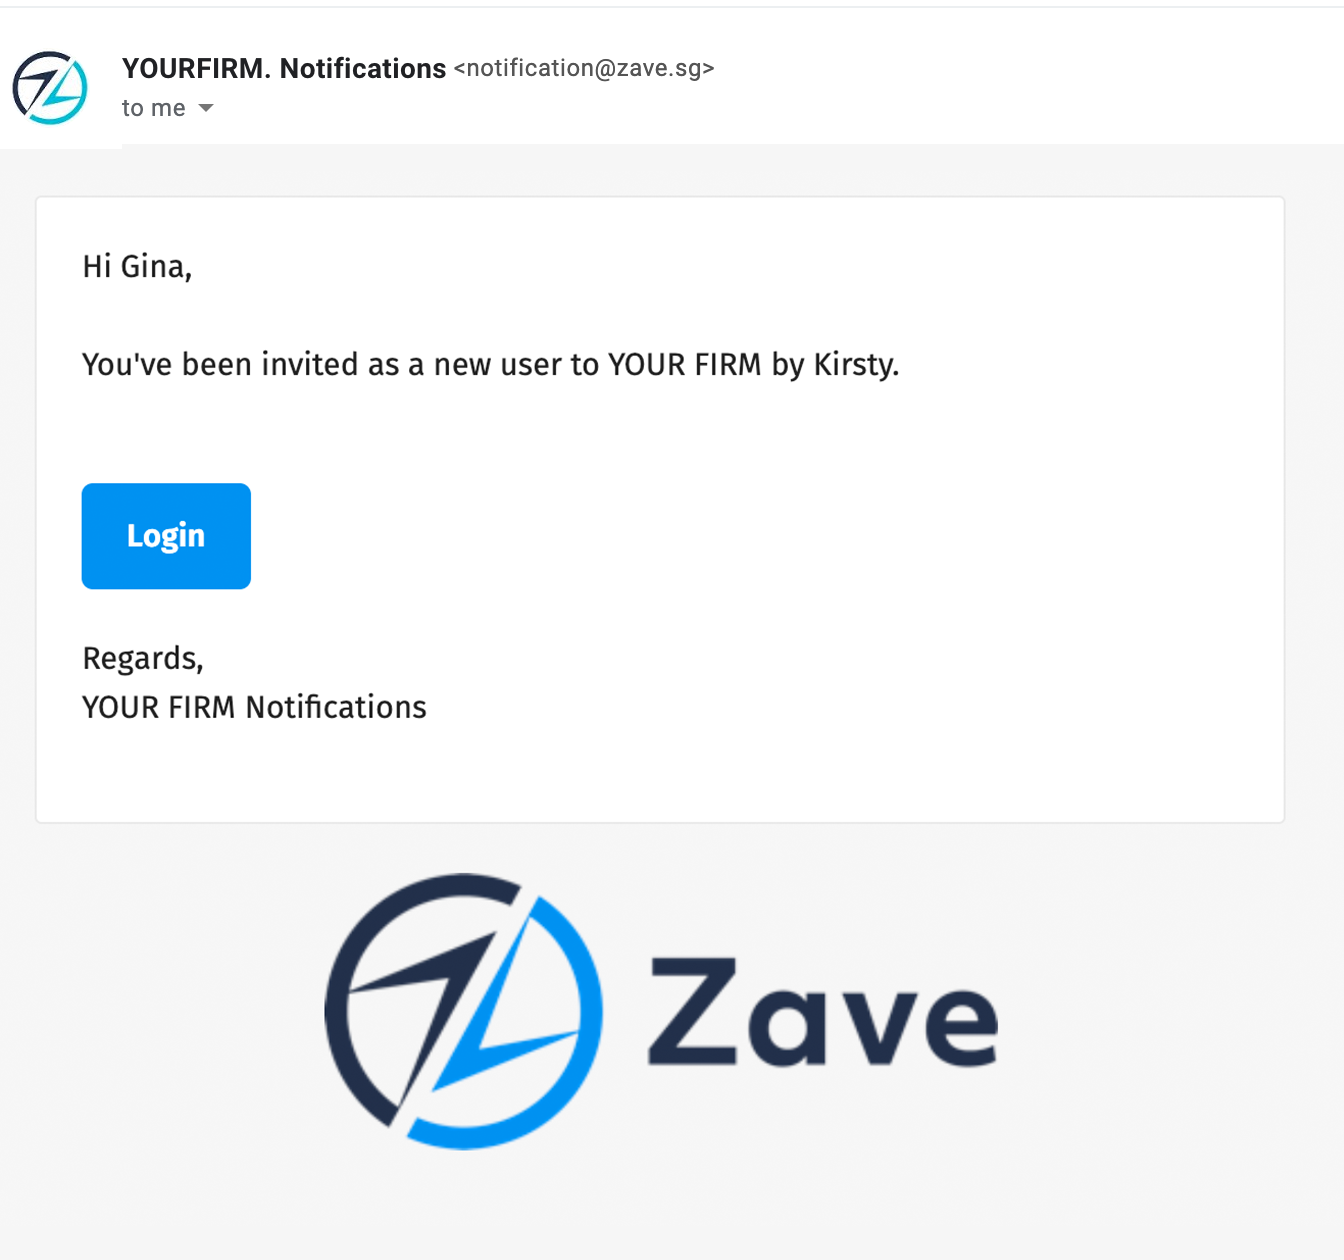
8. The user simply needs to open on the email sent from Zave, and click the ‘Accept’ button in the email to complete the activation.
Here is an example
9. Well done you!
From here head over to the FAQ’s and other handy articles to ensure a smooth onboarding!
The user simply needs to open on the email sent from Zave, and click the ‘Accept’ button in the email to complete the activation.