Navigating the main Menu Bar
Once you’ve set your Profile and adjusted any Admin Settings it’s time to start getting things done!
Everything you need is on the left-hand pane, neatly grouped into three parts to help you Track, Manage and Store everything you need to run your business:
- General
- Compliance
- Finance
GENERAL:
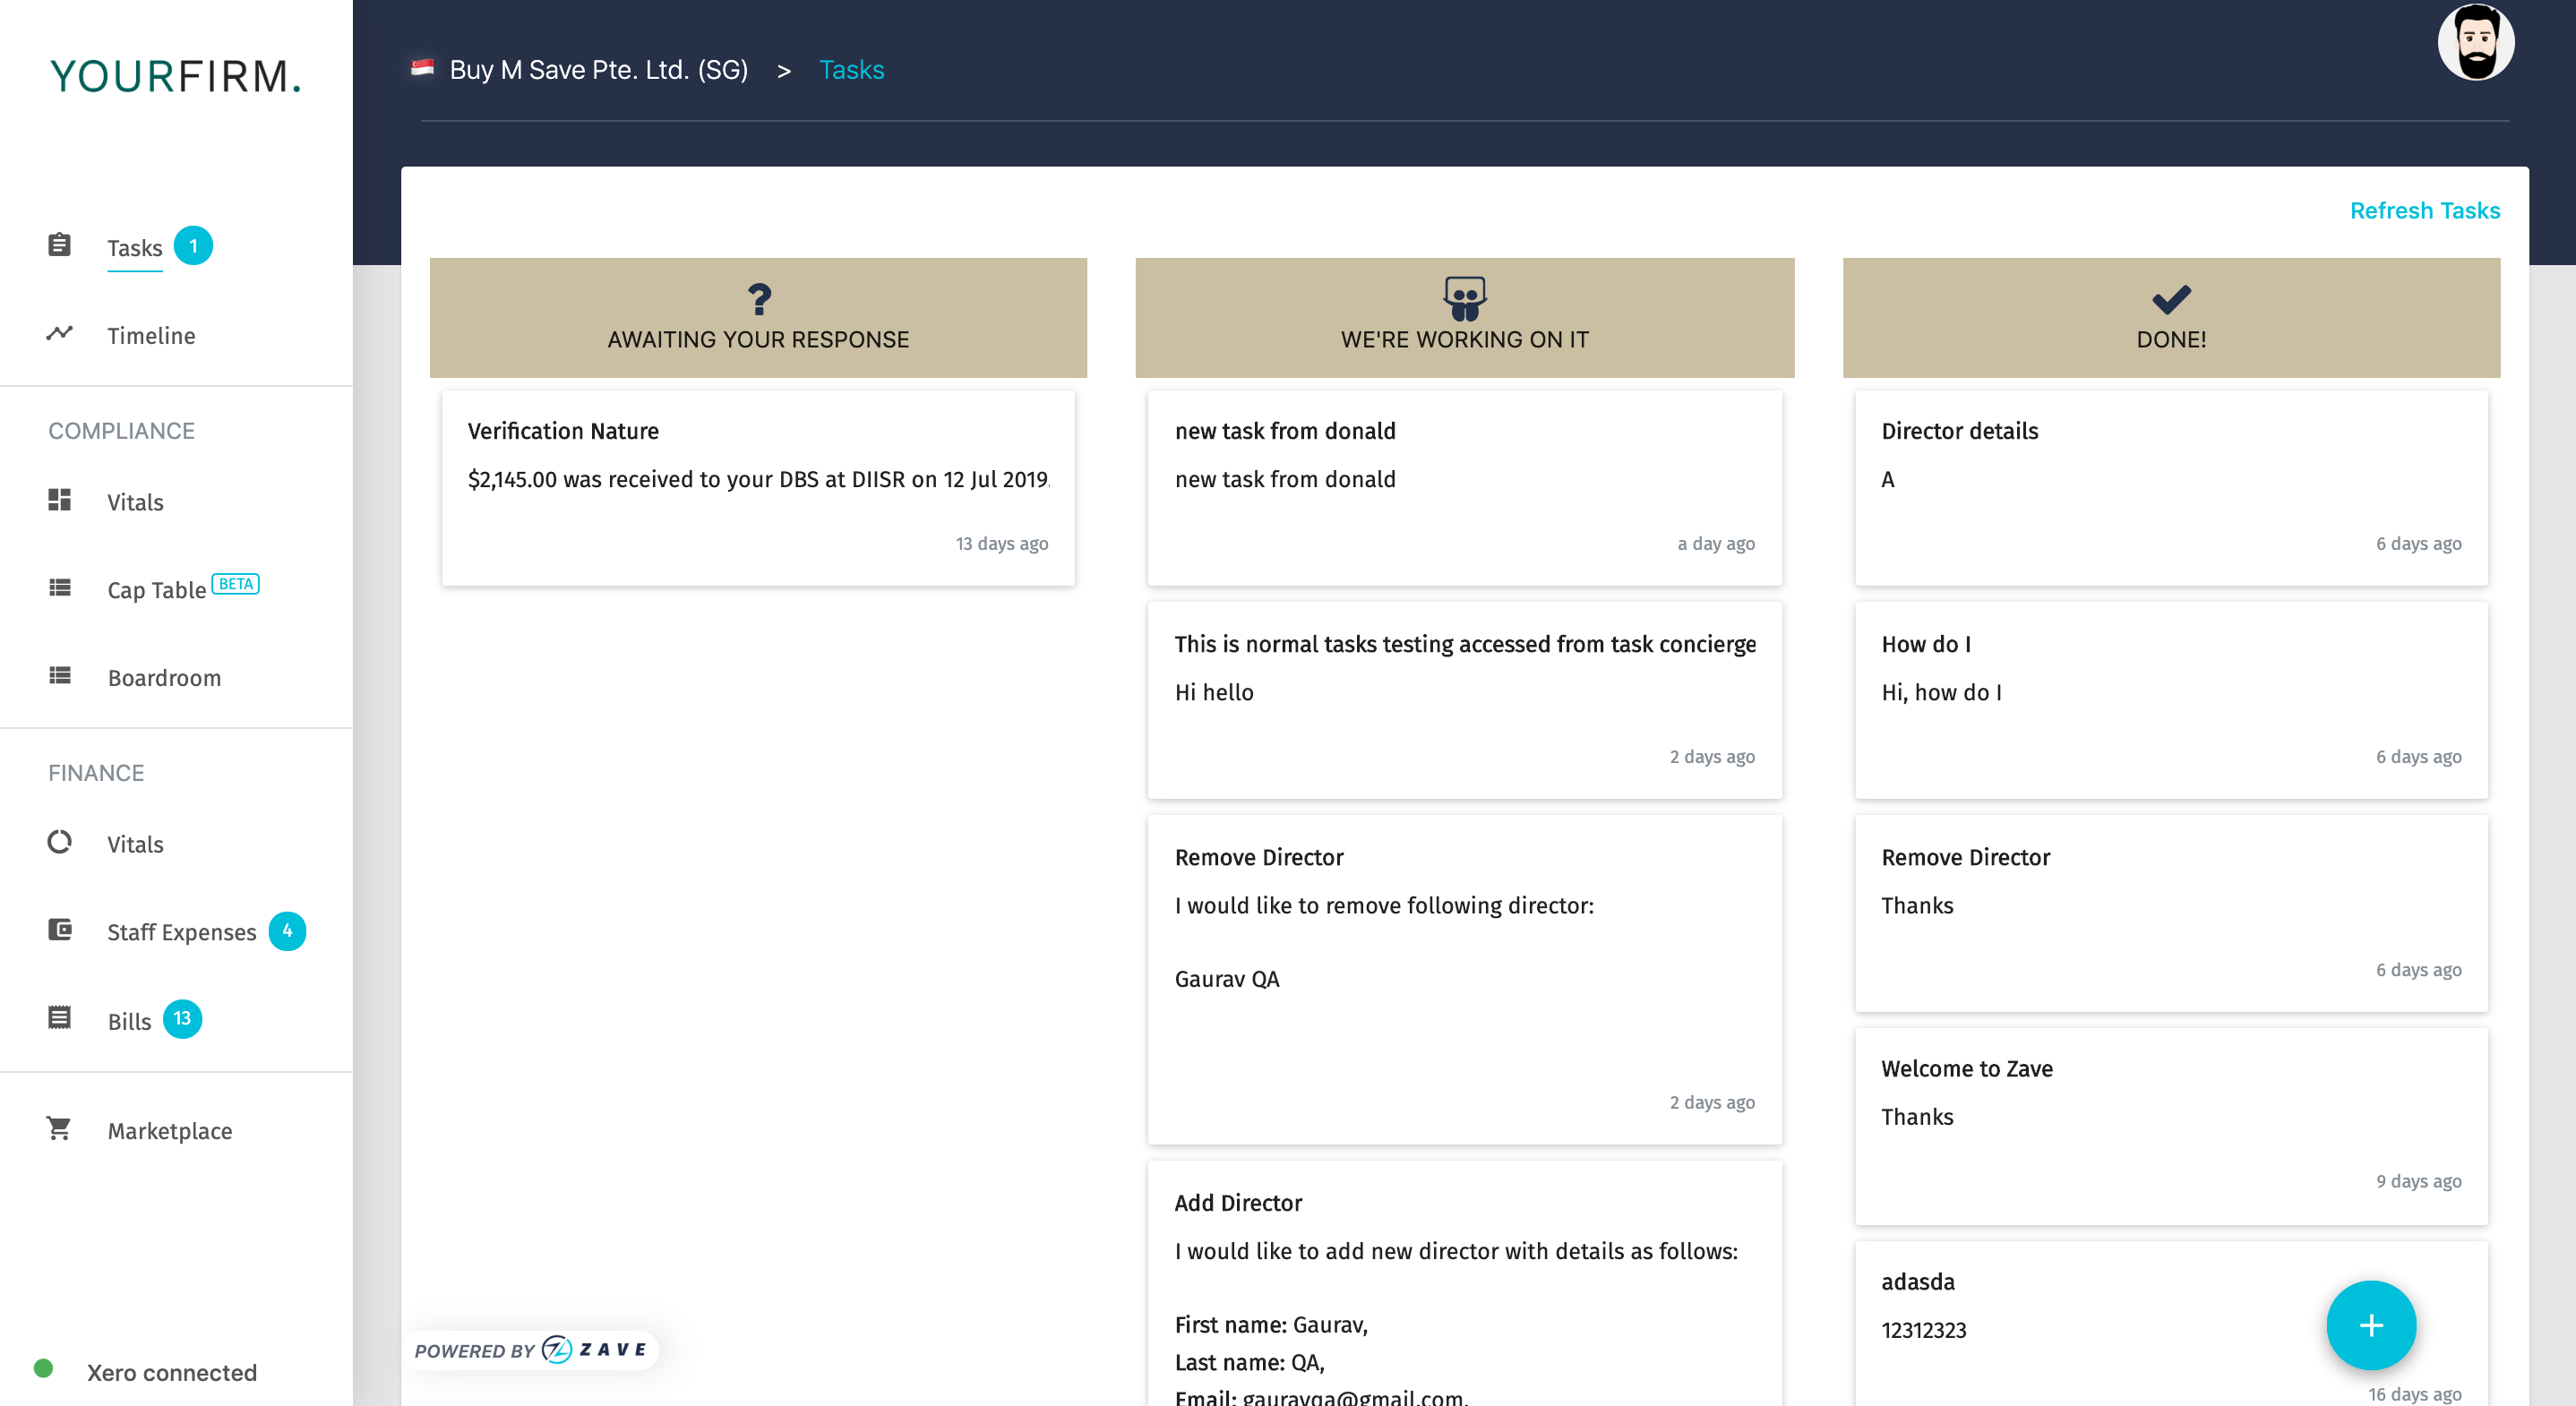
Tasks: This is where you can track and manage all your correspondence with your Service Provider, keep on top of your communications, raise a task for your Service Provider when you need to.
For more information about Tasks, head over to Link
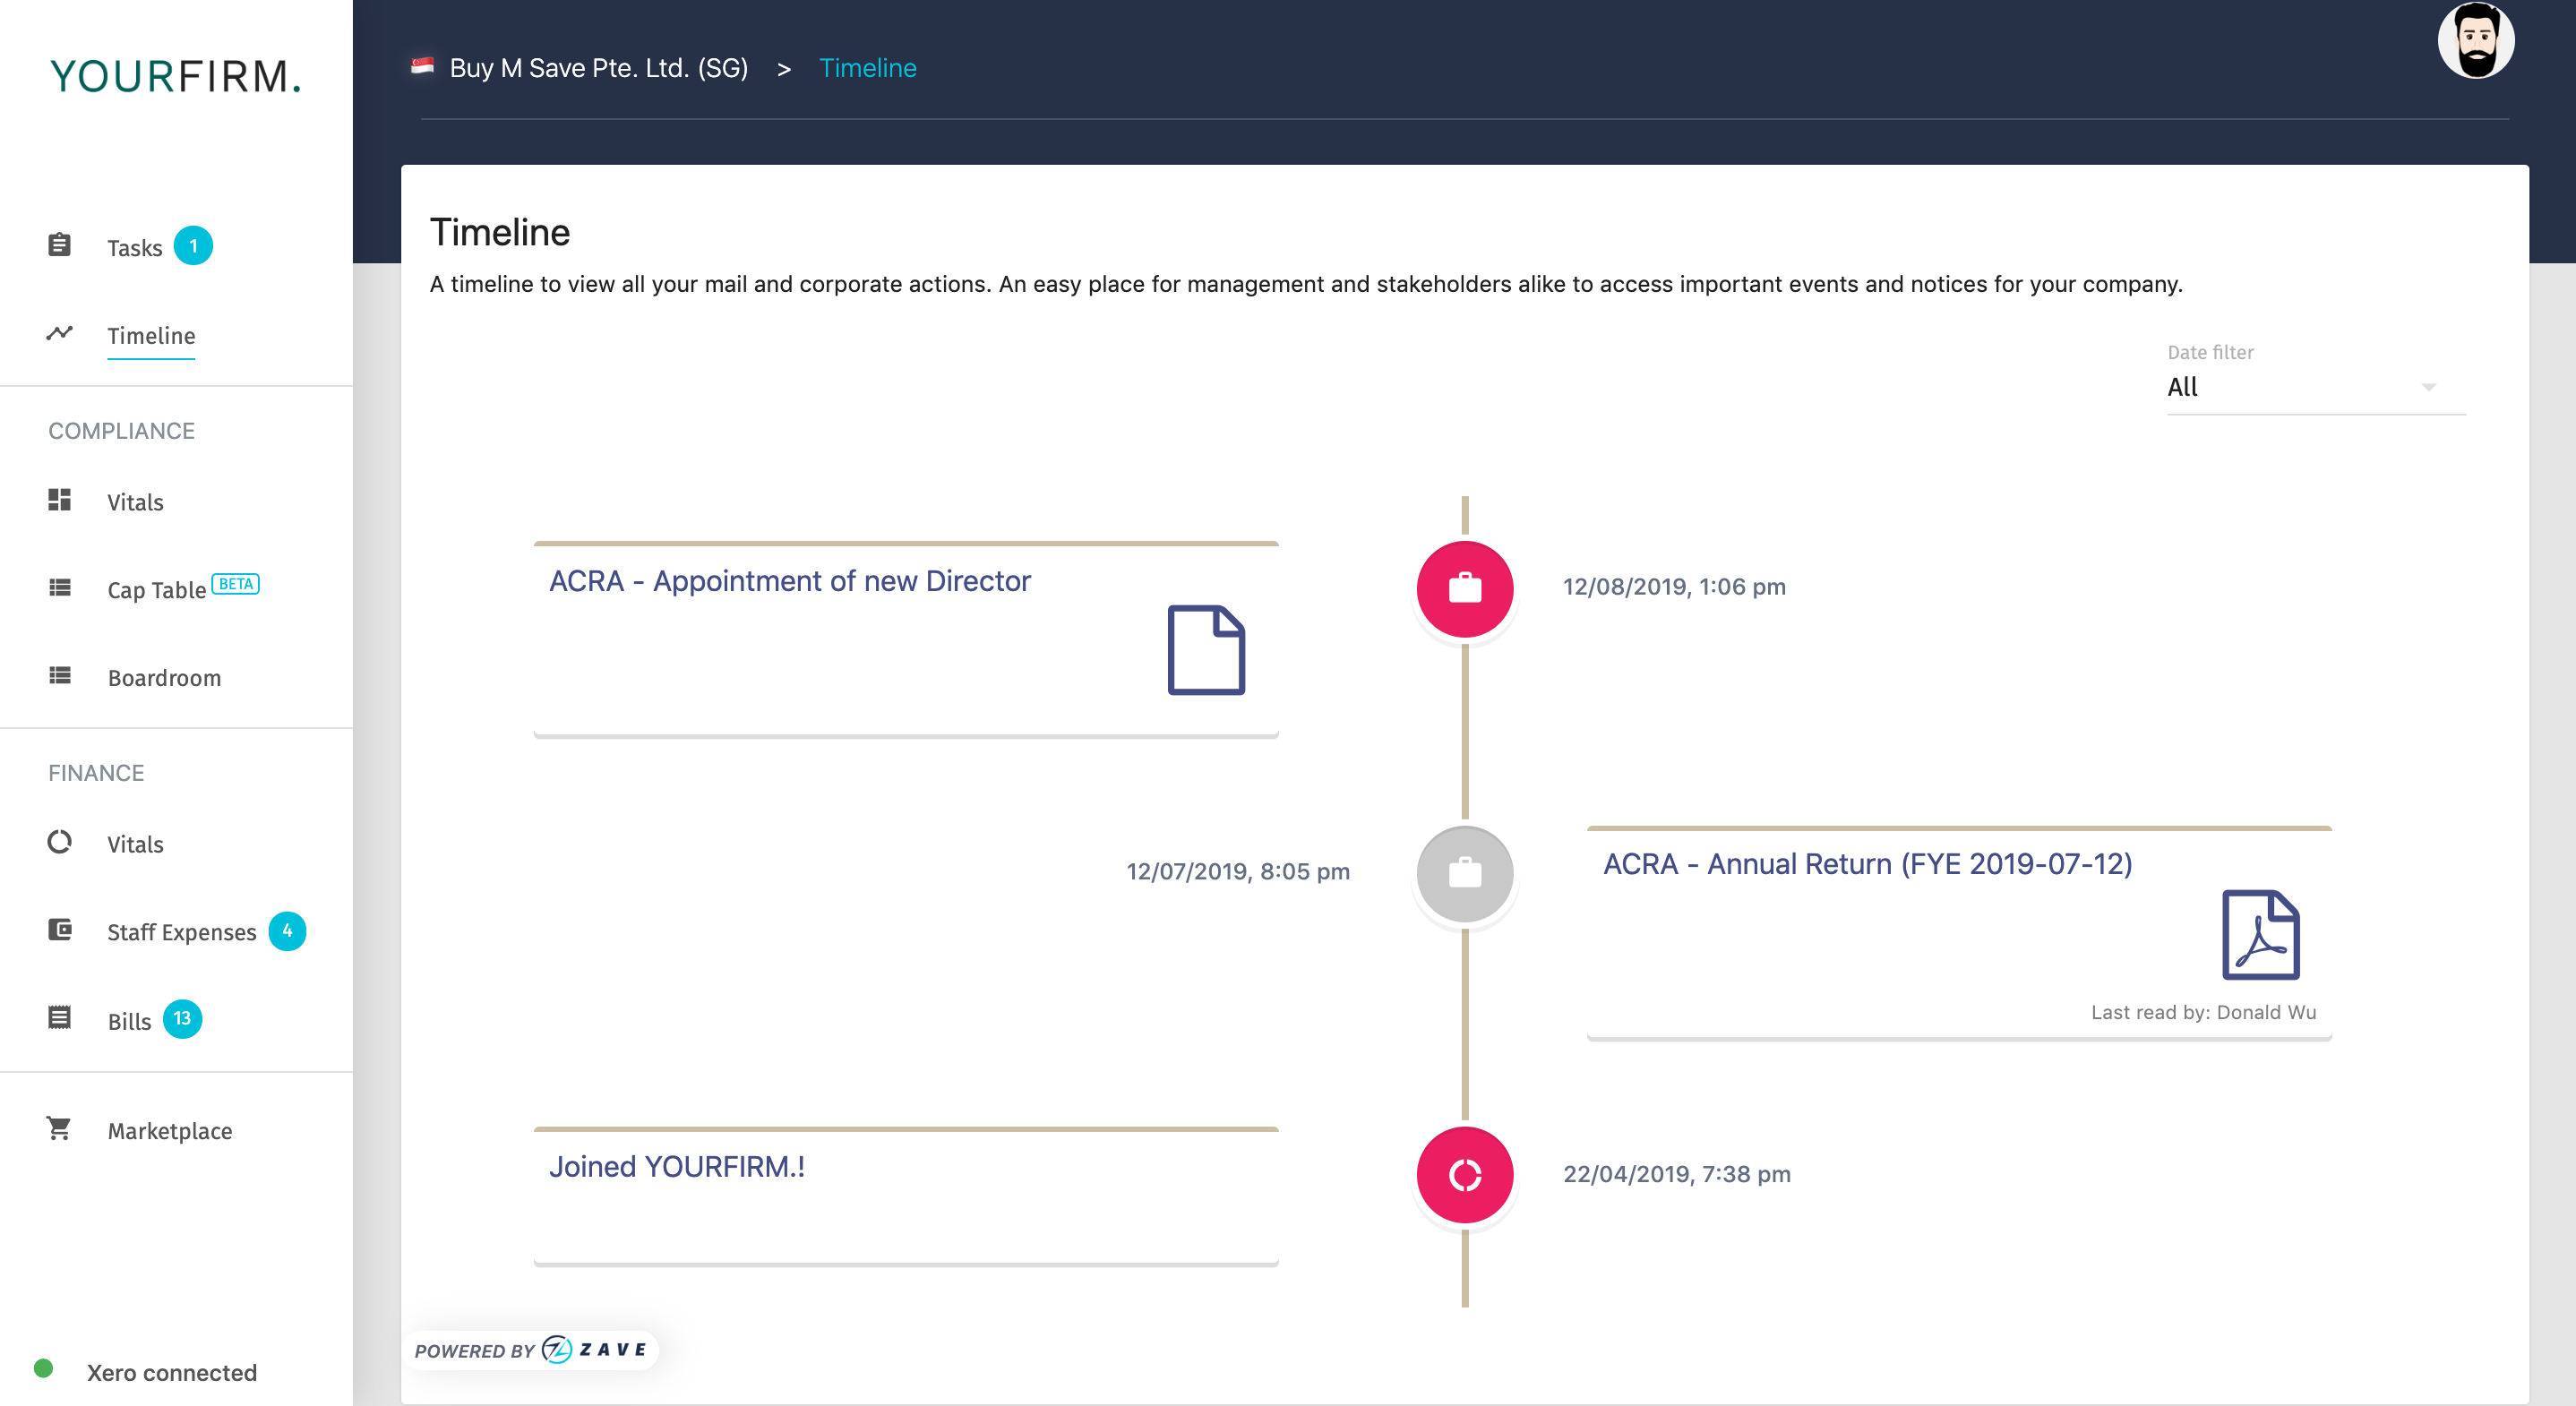
Timeline: This is where you will store and track all of your key documents, neatly presented in chronological order for ease of viewing. If you want to filter on some historical documents, we’ve got you covered, you just filter on the date filter.
For information about the Timeline feature, head over to this Link
COMPLIANCE:
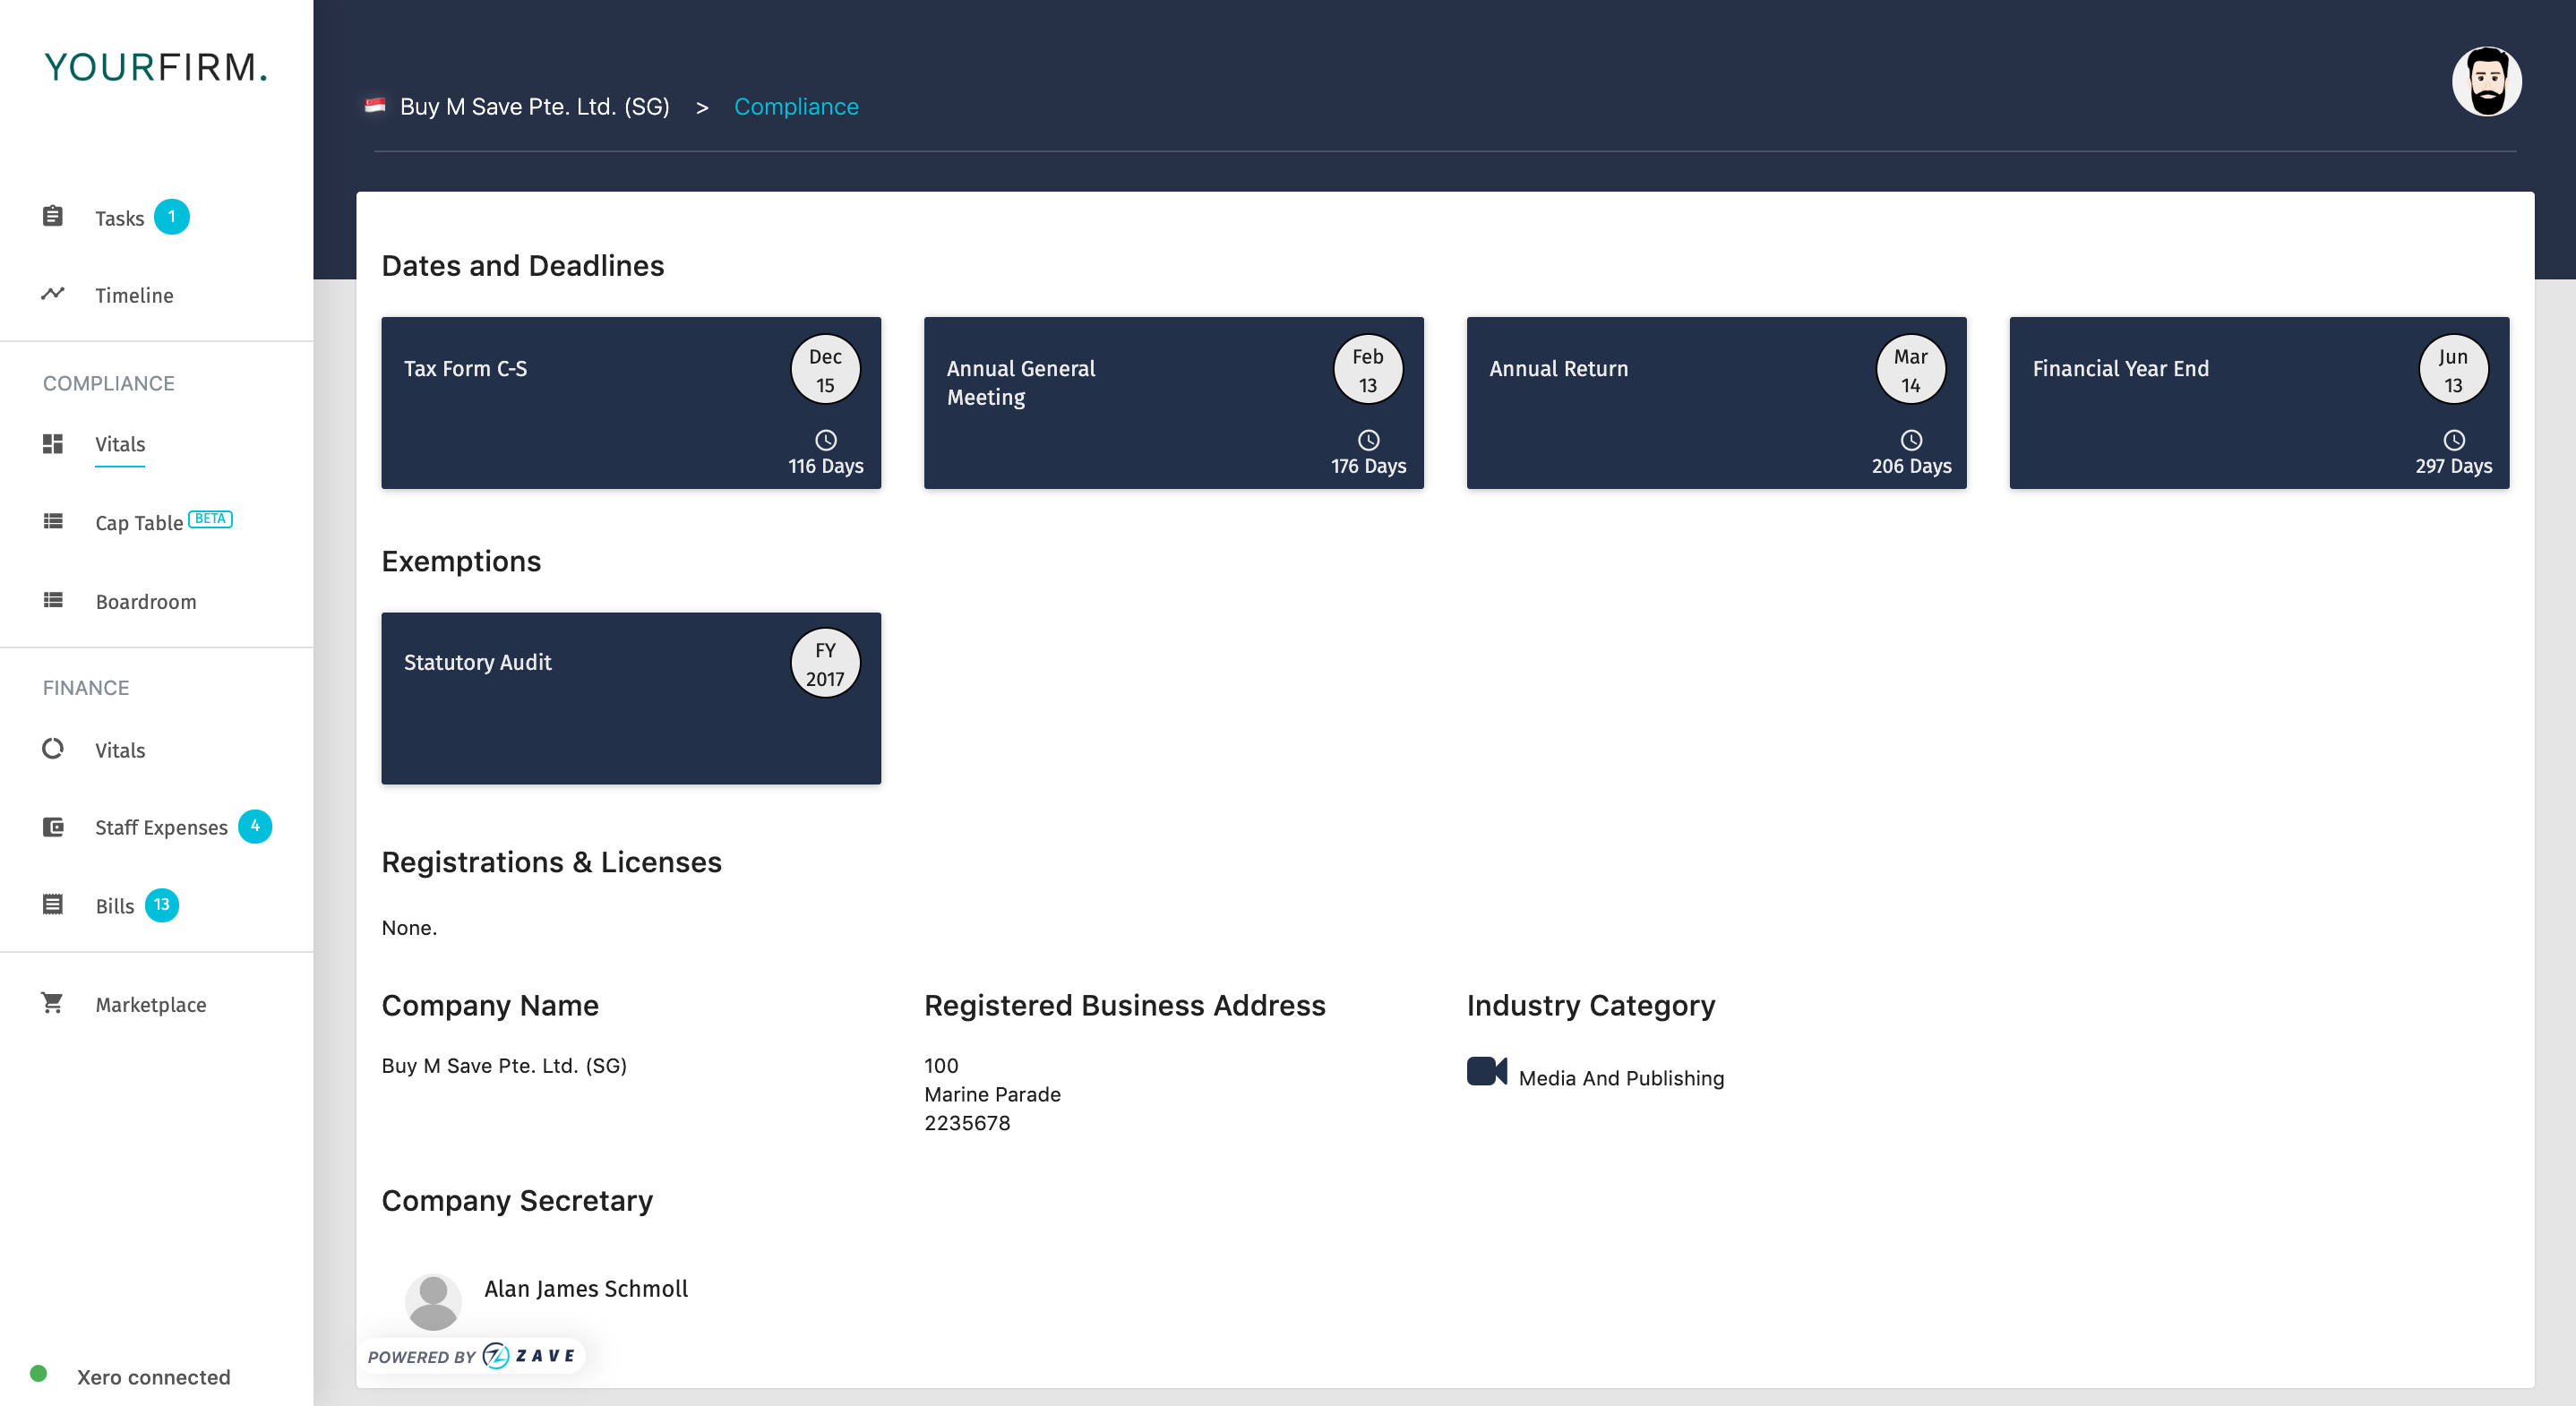
Vitals: Here you can track and manage all of the critical dates, deadlines and general information related to your company.
For more information relating to Vitals, head over to this Link
Cap Table: This provides you with the current shareholding information for your company, including who the shareholders are, the type of security that each hold, number of shares and paid-up capital, as well as pending allocations of new shares.

Director: Track and store details for current, pending and past Directors, with handy details relating to the appointment and resignation dates.
For more information, head over to this Link
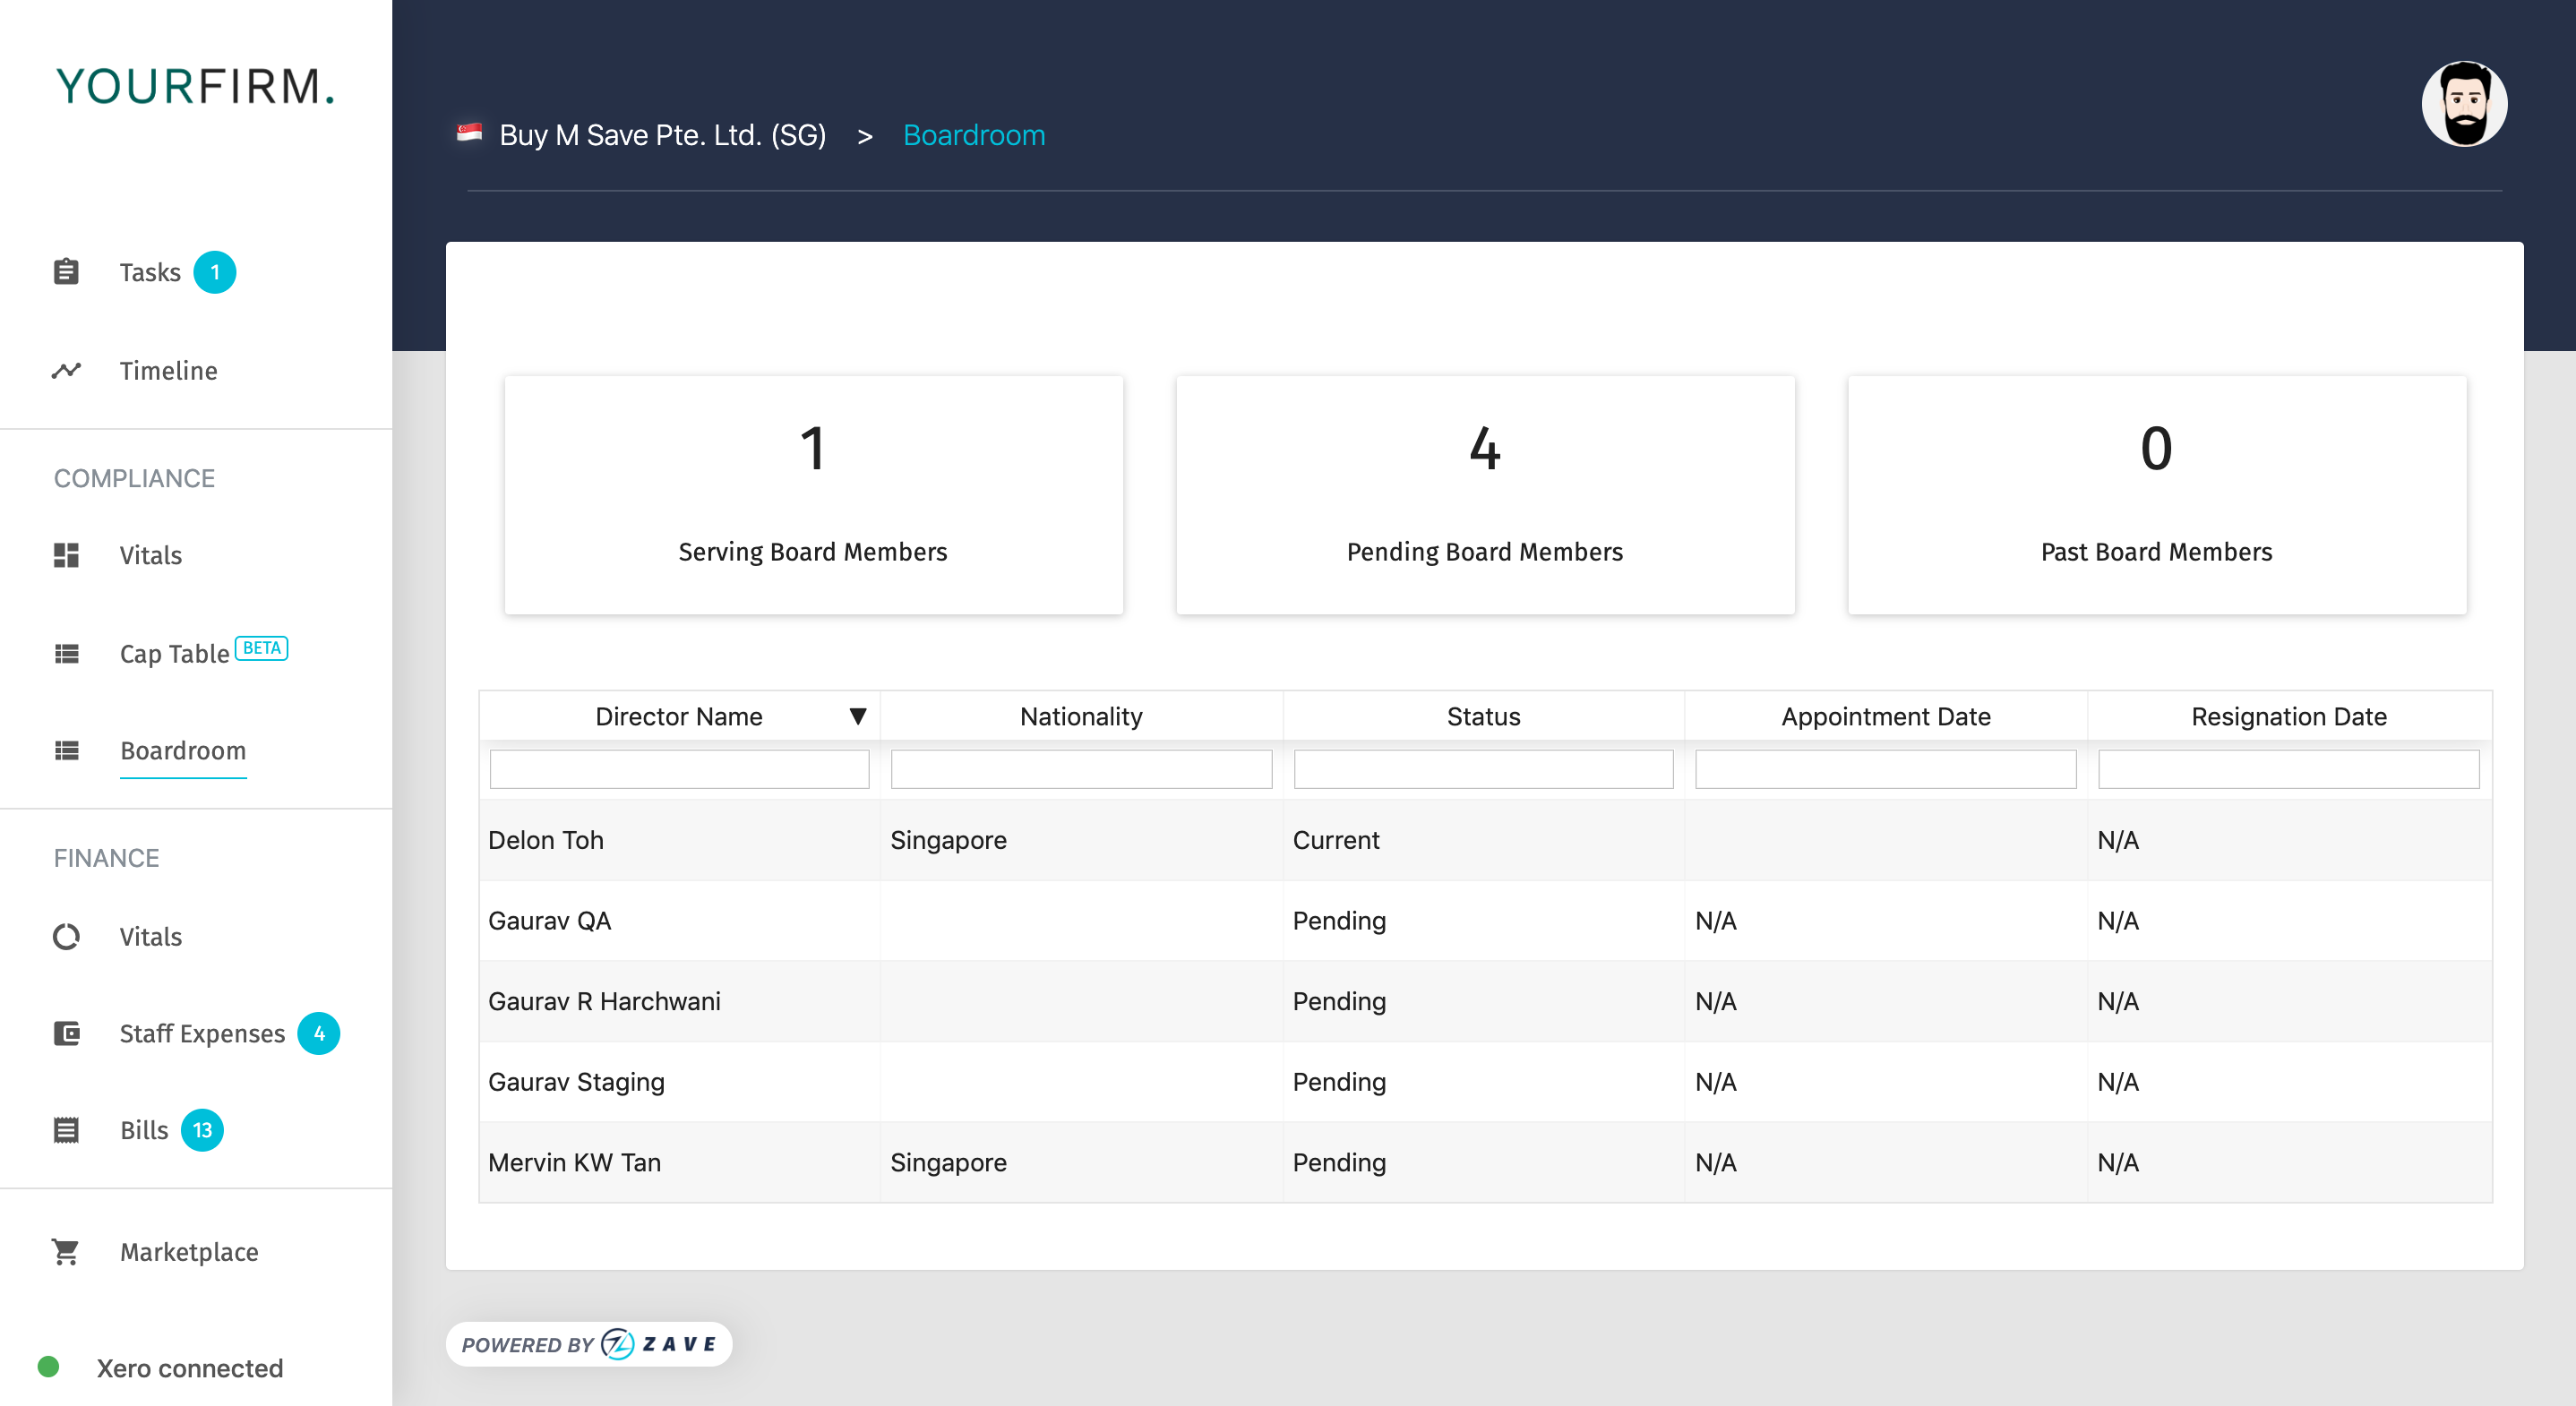
Pro-Tip: Ensure that information is captured completely whenever there are changes to the company Director’s details, doing so will pay back dividends when you need to find these details.
FINANCE:
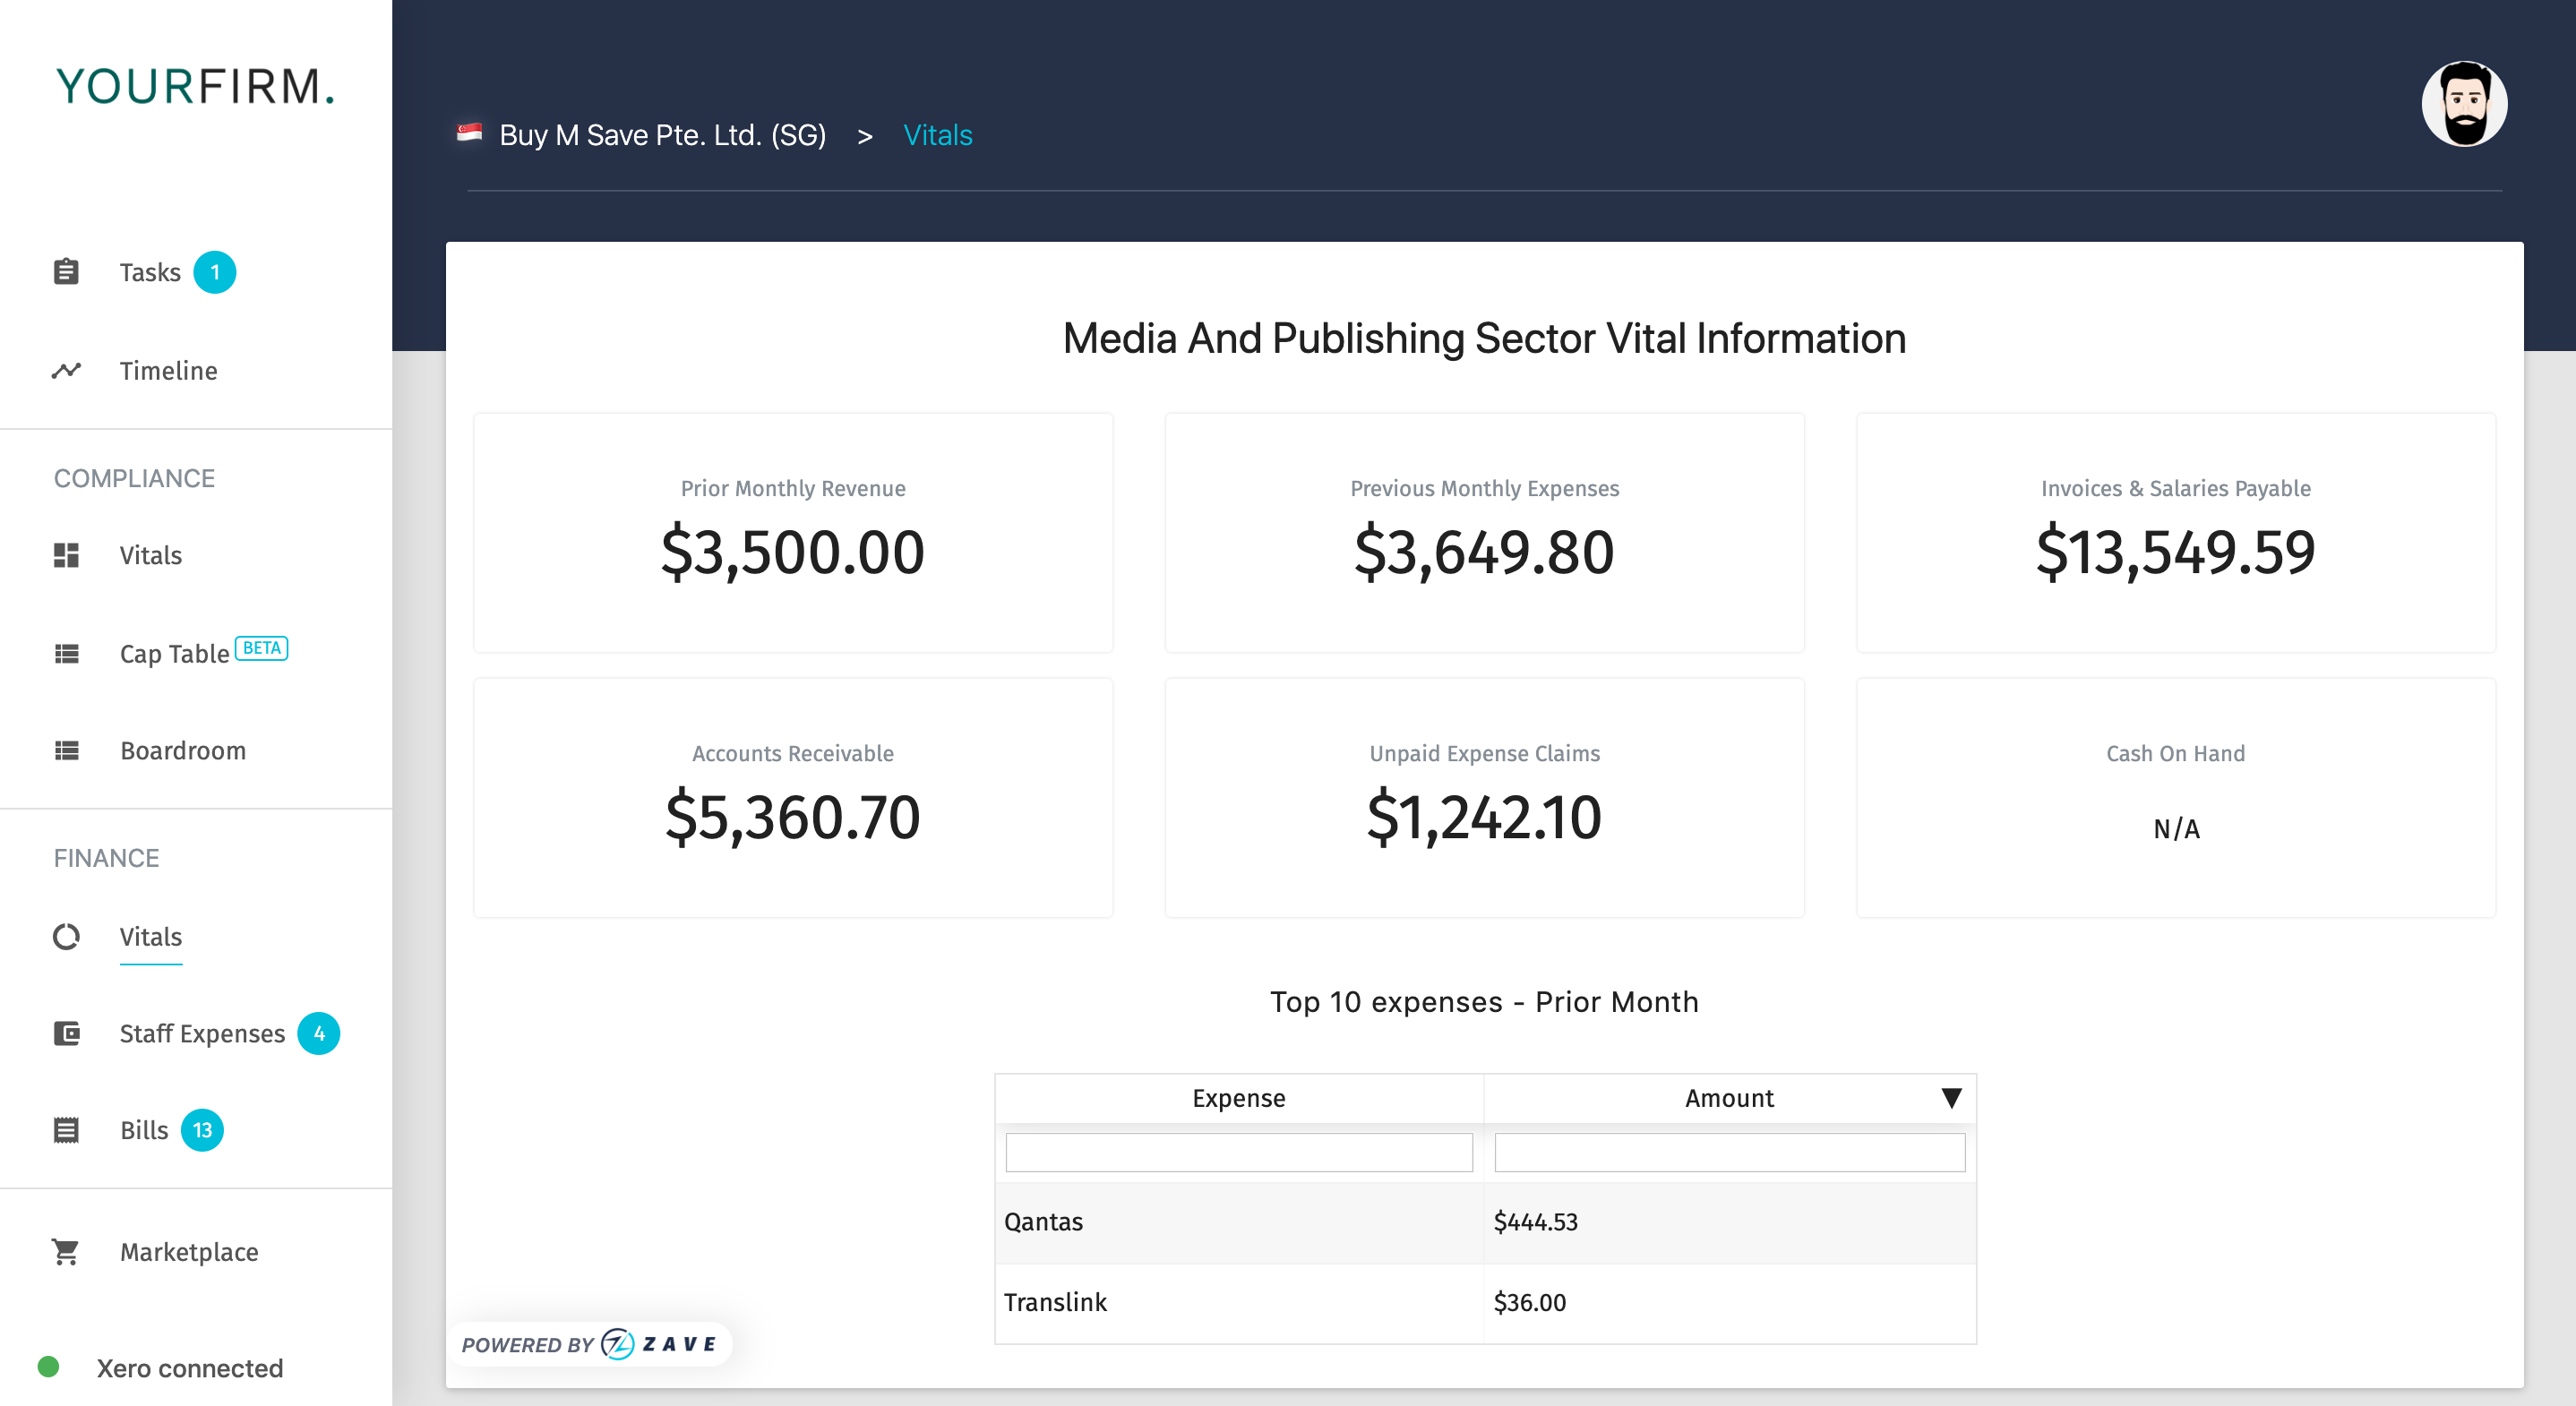
Vitals: This is where you can track and manage key information relating to your company’s important financial information at your fingertips. The Financial Vitals page is synchronized with Xero, to keep this information up to date when you need it, including cash at bank, revenue, expenses, accounts receivable, unpaid staff expenses as well as the prior period’s top 10 expenses.
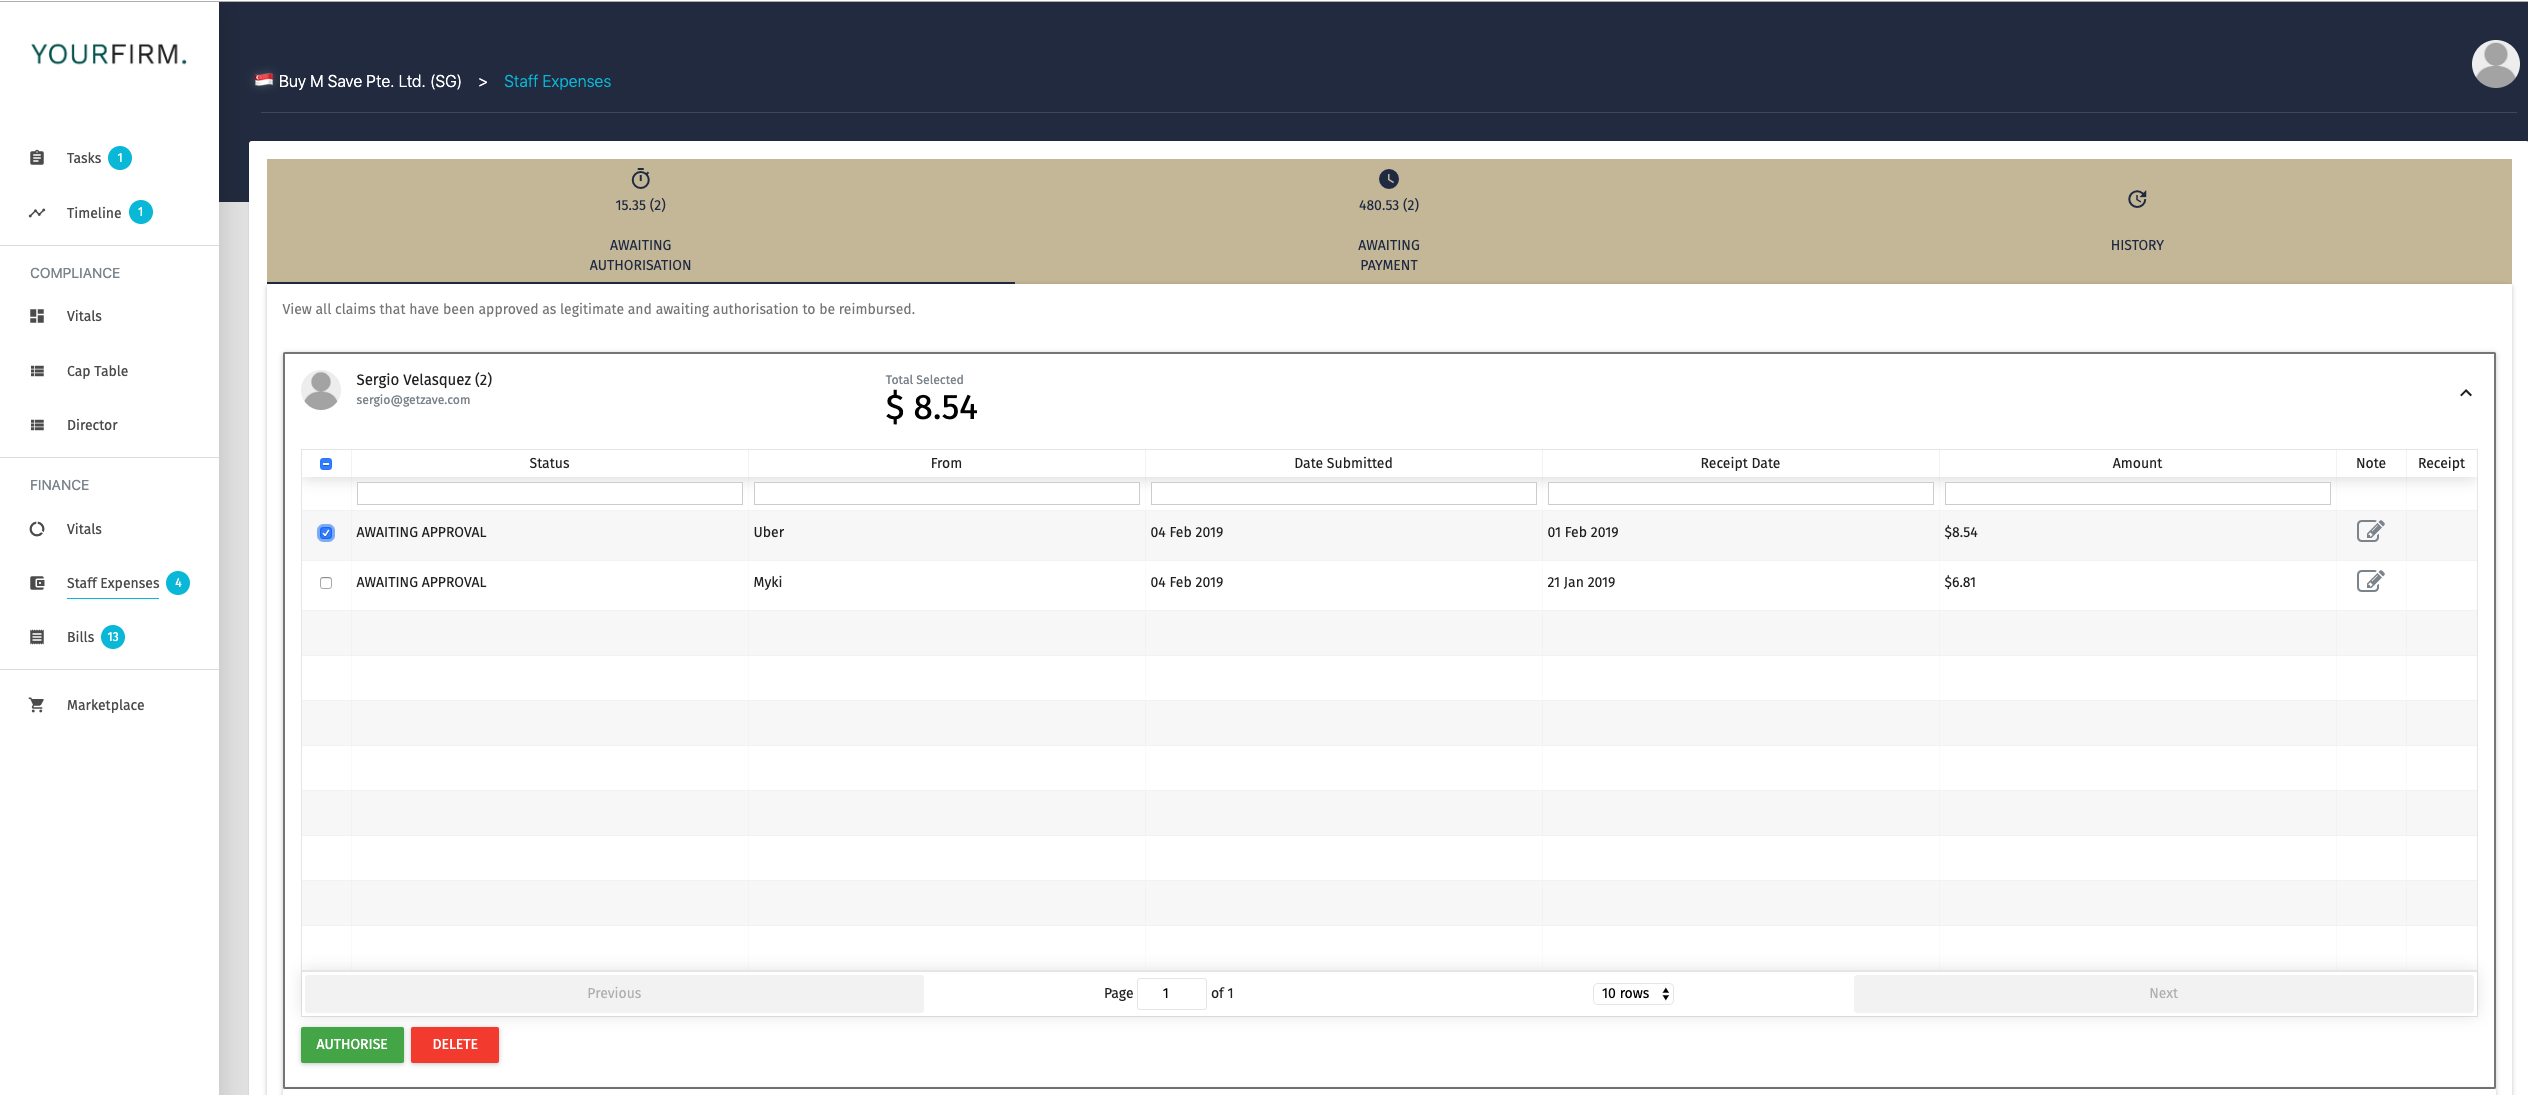
Staff Expenses: Here you can track, manage, review and approve your staff’s business expenses.
Staff expenses will first appear as “Awaiting Authorisation”, requiring the relevant approver within your company to review the receipt and any notes the staff member has noted. The relevant approver can then authorize or reject each item individually, or in bulk for convenience.
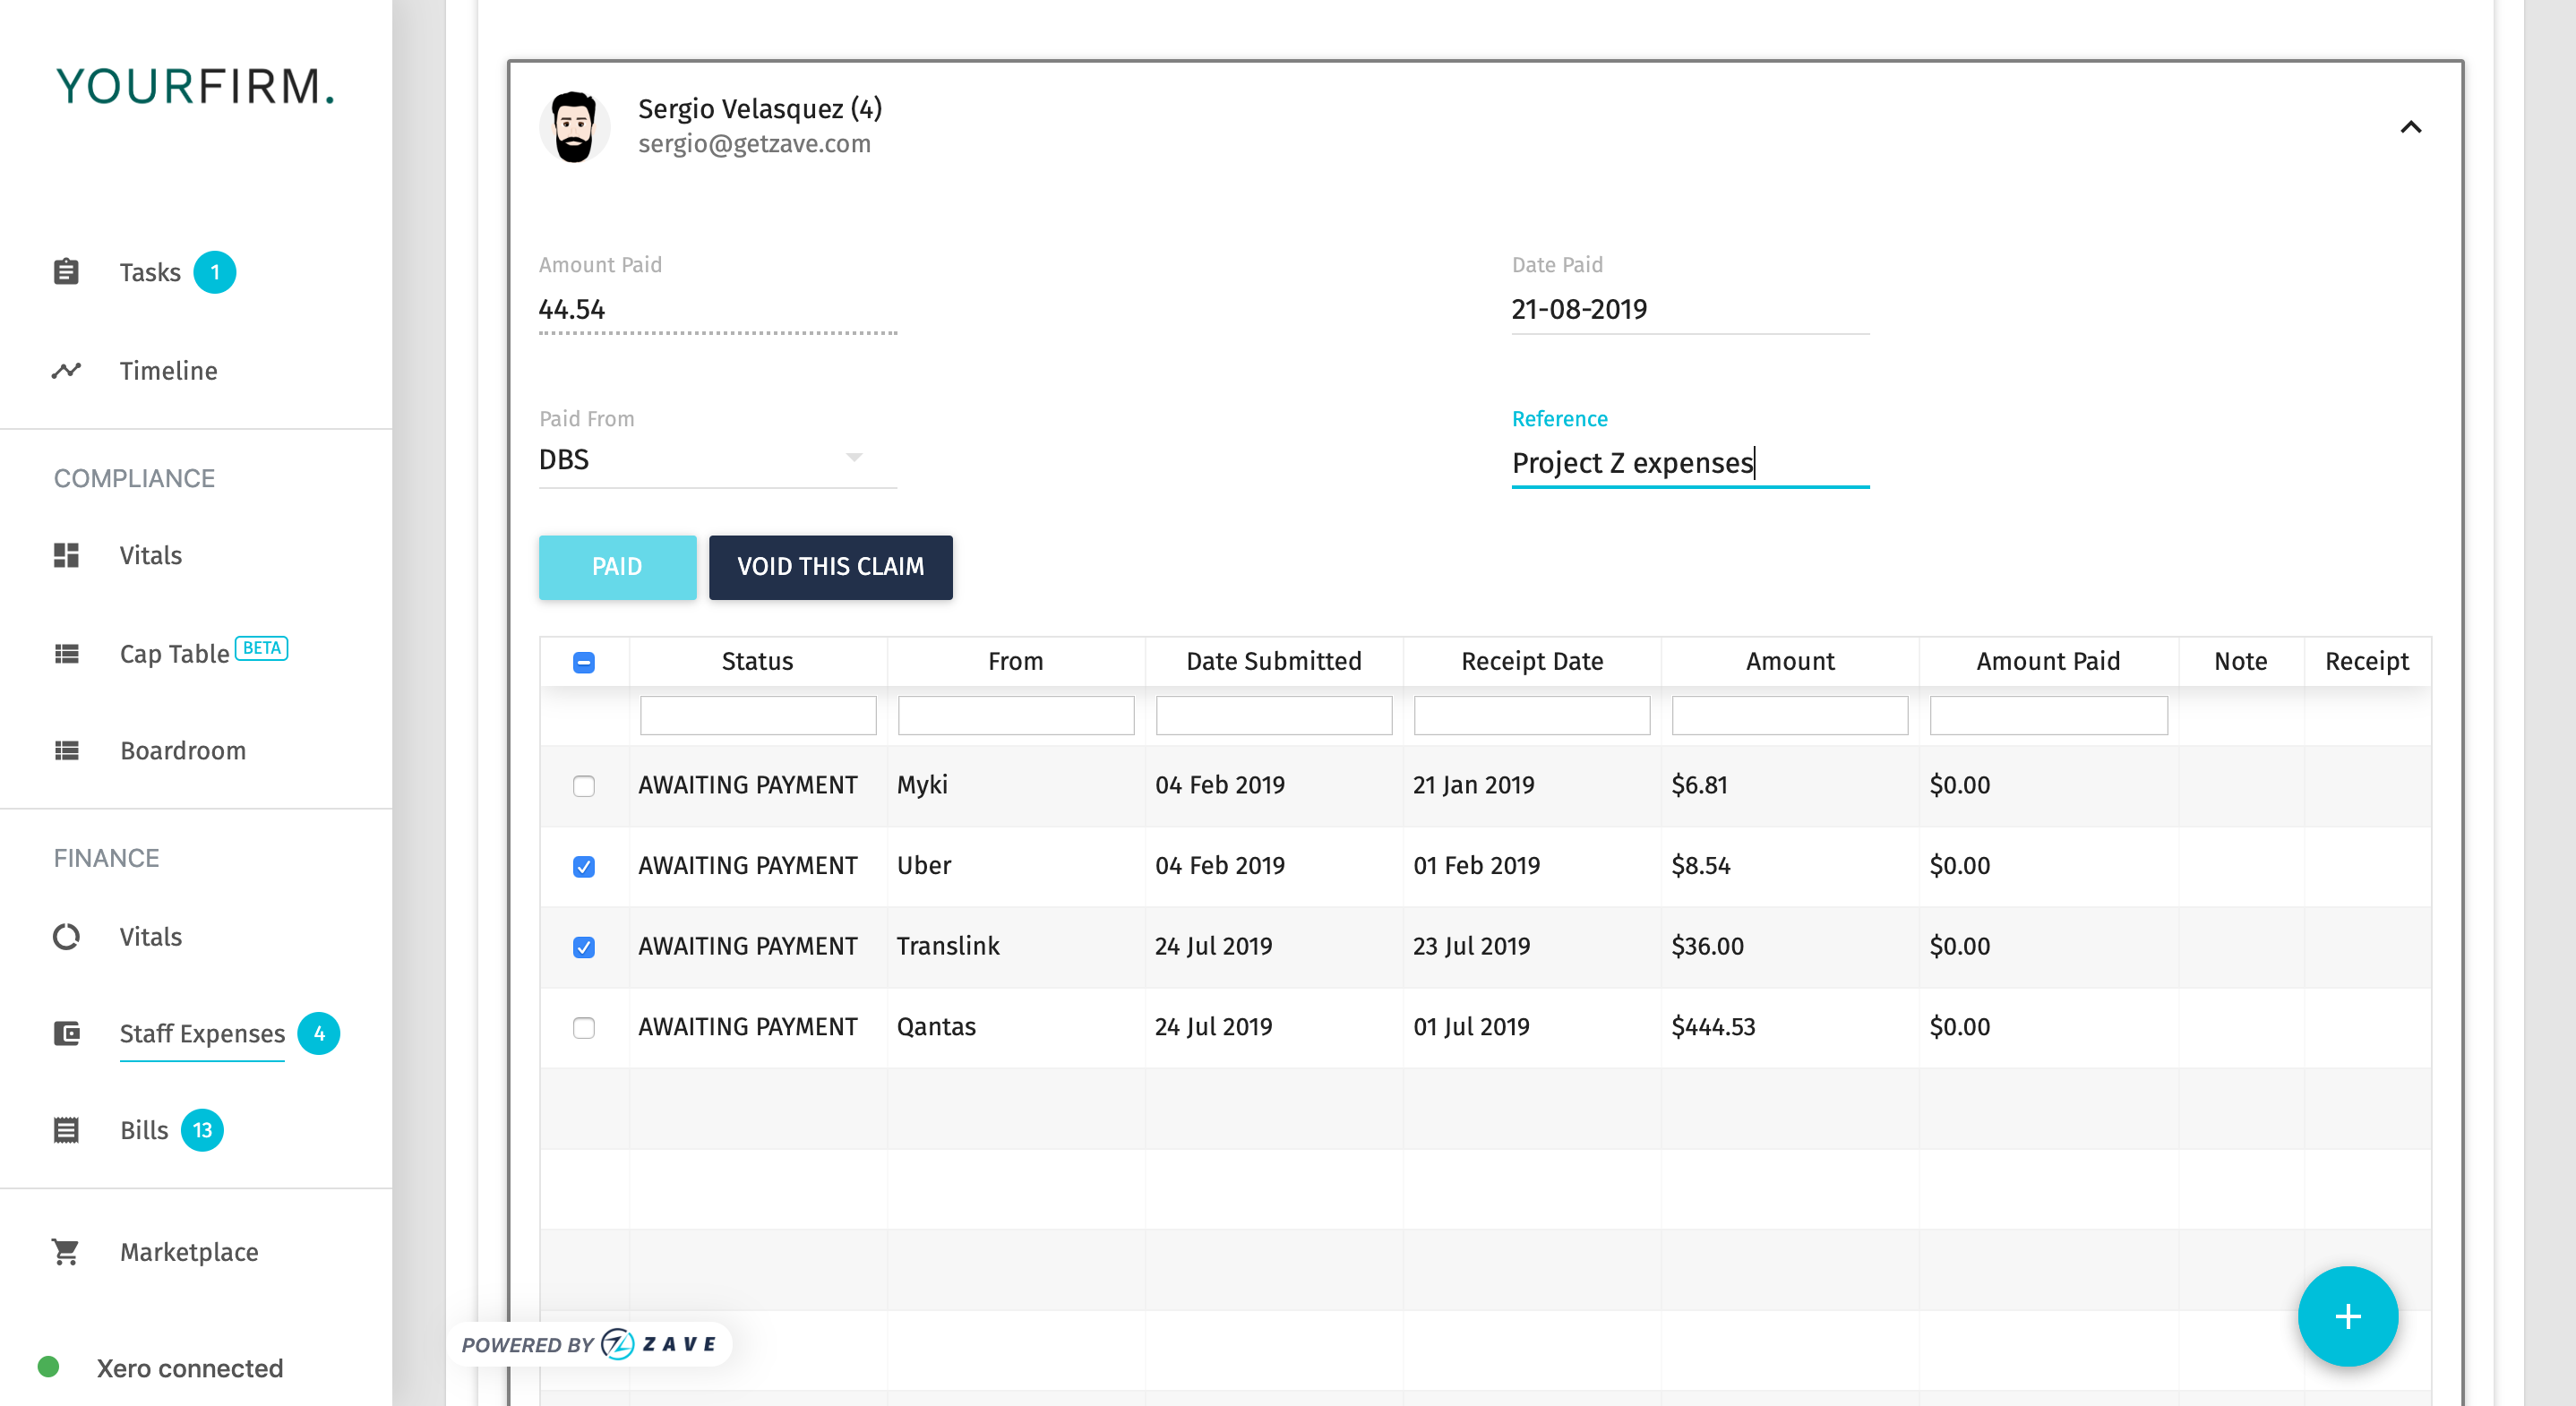
Items authorized will move to “Awaiting Payment”. In order to reimburse your staff, simply follow your company’s existing payment processes with your Bank. Once those authorized items are paid, simply come back into your Zave portal, select the items you have paid, and mark them as “Paid”, together with the information required in the drop-down selections.
Bills: Using the same logic as “Staff Expenses” above, this is where invoices paid by staff which need to be reimbursed are filed. These items will sit under “Awaiting Authorisation”, ready to be reviewed and authorized or rejected.
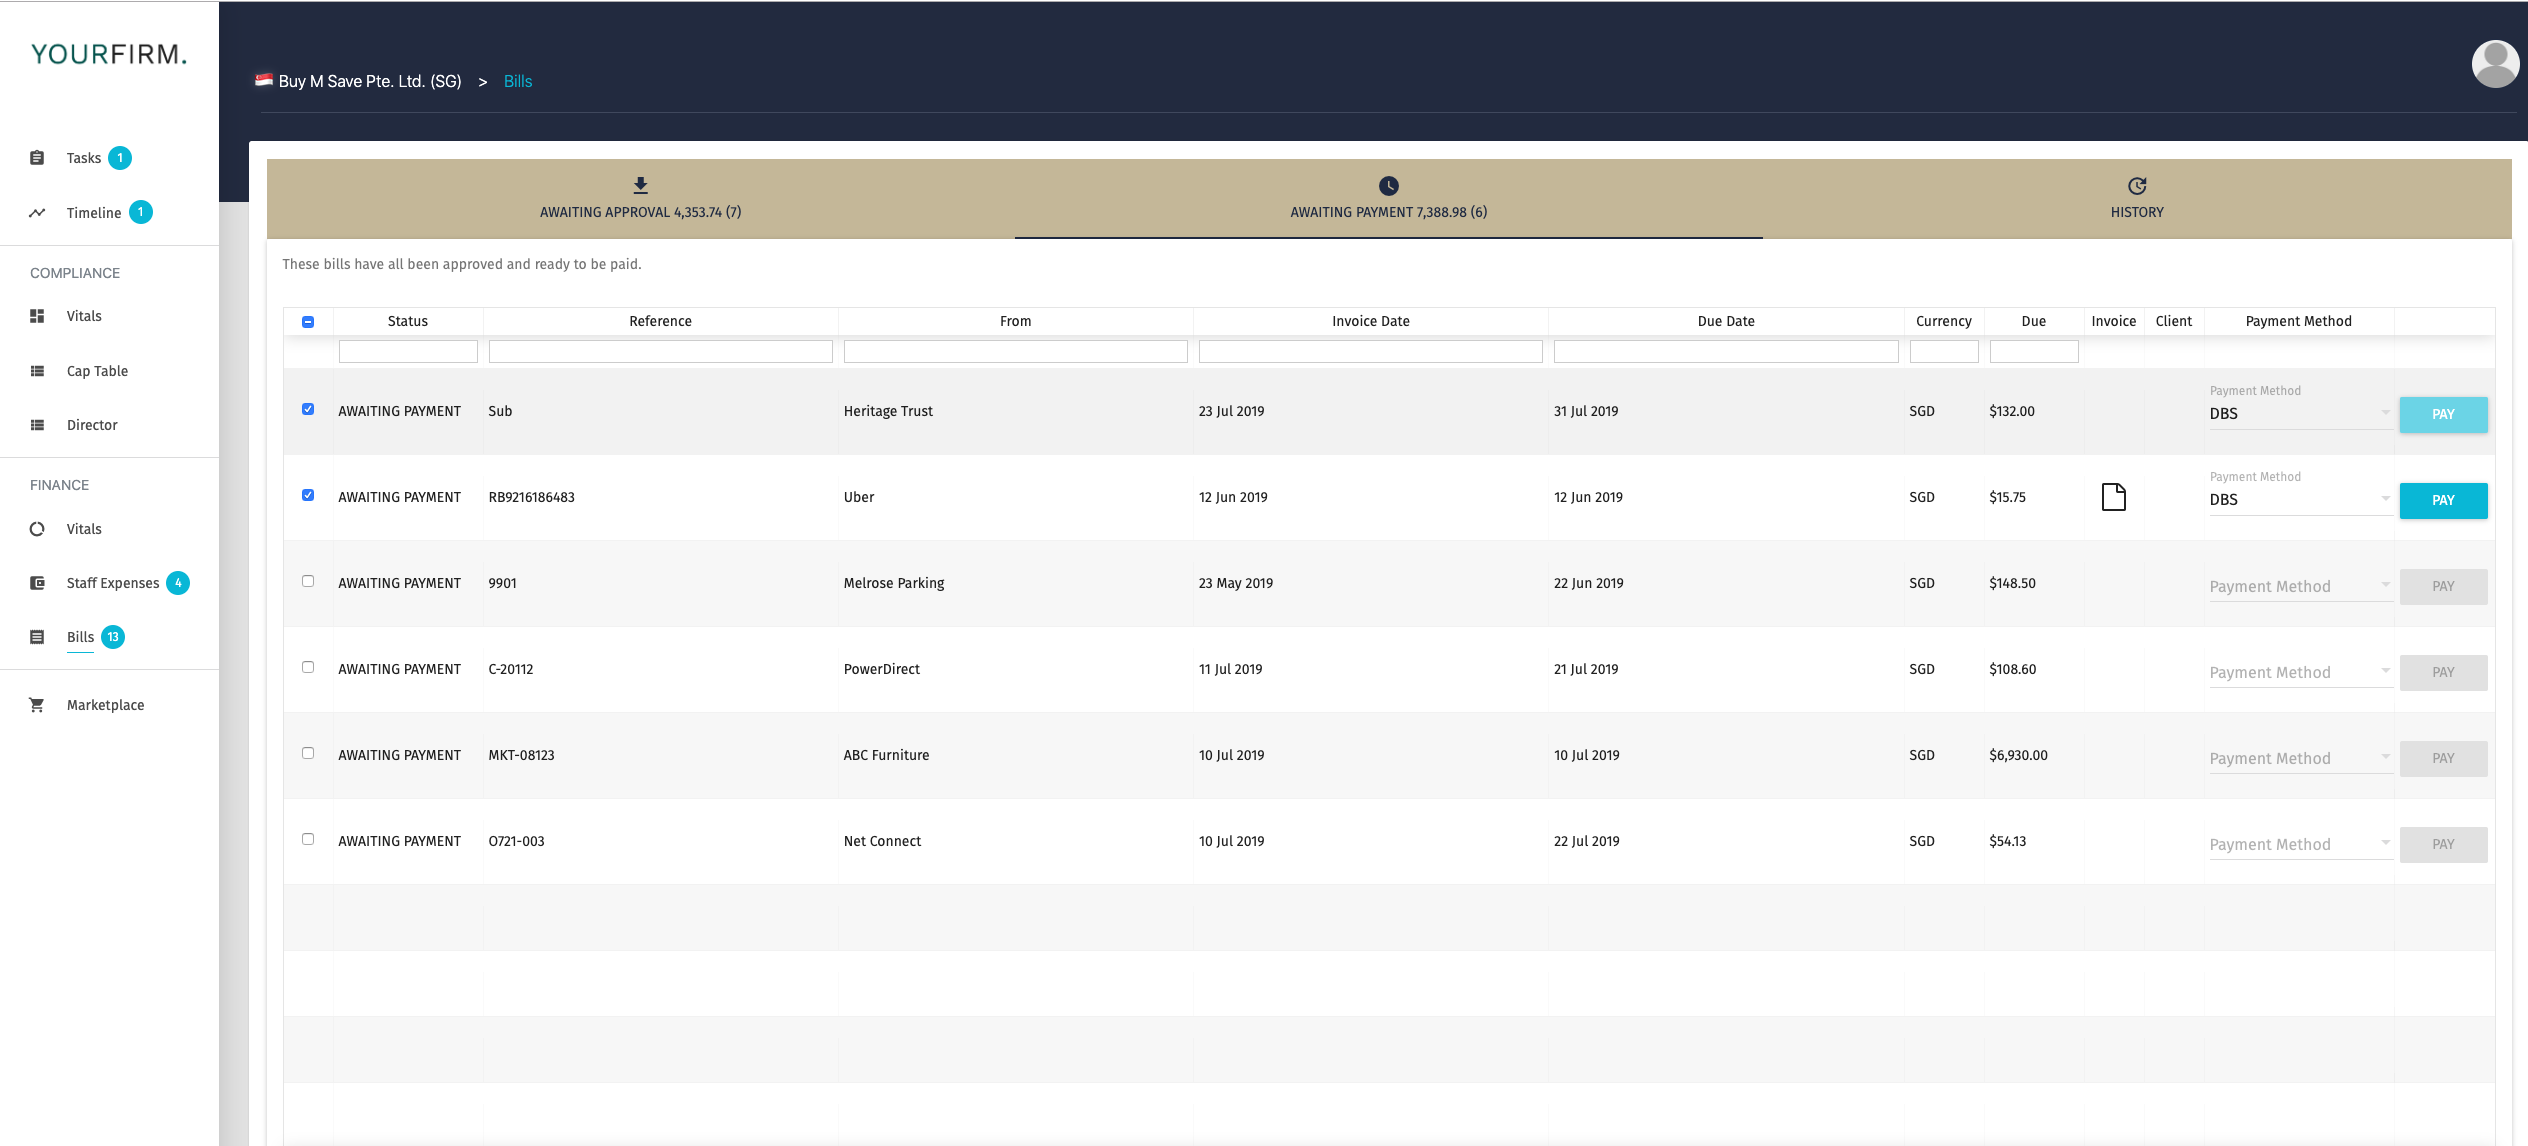
Once invoices are authorized, they move to “Awaiting Payment”, ready for you to reimburse your staff.
Top job! That covers the basics, for more details head over to the main page to find additional resources, tooltips and support guides.